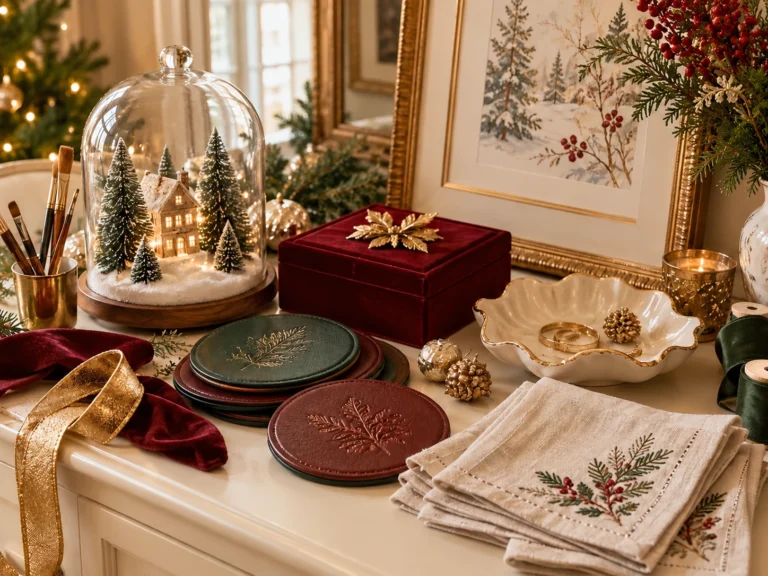

Learning how to make a Christmas wreath is easier than you might think. With a simple wreath frame, a few evergreen branches, florist wire, and your favorite decorations, you can create a beautiful holiday decoration for your front door or living room.
This DIY Christmas wreath is perfect for beginners because you do not need complicated tools or expensive supplies. Customize it with pine cones, red berries, dried orange slices, or a festive ribbon to create a handmade decoration that matches your home.
Materials You Need
Gather your supplies before you begin. You can use fresh greenery for a natural look or artificial branches if you want a wreath that you can reuse.
- Wreath frame: Choose a wire, rattan, or twig frame. A frame around 12–14 inches across is a manageable starting size for a door wreath.
- Greenery: Collect pine, fir, spruce, eucalyptus, or other suitable evergreen clippings. Artificial greenery also works.
- Florist wire: Use it to hold the greenery bundles firmly against the frame. Green-coated wire blends into the foliage.
- Christmas ribbon: Choose a ribbon that complements your greenery. Wired ribbon is especially useful for making a bow that holds its shape.
- Pine cones: Add natural texture and a rustic Christmas feel.
- Decorative berries: Artificial berry sprigs add a traditional red accent.
- Dried orange slices: These create a warm, natural look.
- Cinnamon sticks: Add a rustic touch to your finished wreath.
- Twine or sturdy ribbon: Use this to create a hanging loop if your frame does not already have one.
You do not need every decorative item listed above. Choose a few that complement one another and suit your preferred style.
Tools You Need
- Pruning shears or garden scissors: Cut fresh branches into manageable pieces.
- Wire cutters: Trim florist wire cleanly.
- Craft scissors: Cut ribbon and twine.
- Gardening gloves: Protect your hands from prickly foliage and sticky sap.
- Hot glue gun and glue sticks: Optional for attaching compatible artificial decorations.
Keep sharp tools away from children. If you use a hot glue gun, place it on a heat-resistant surface and handle it carefully.
Before You Start
A little preparation makes wreath-making easier and helps you avoid a messy or uneven result.
- Protect your workspace. Cover a table with kraft paper, cardboard, or an old cloth to catch fallen needles and sap.
- Prepare your greenery. Remove damaged leaves and cut branches into manageable pieces. Pieces around 5–8 inches long are a useful starting point, depending on the frame.
- Sort your decorations. Keep greenery, ribbon, pine cones, and other accents in separate groups.
- Choose your color palette. Green with red and cream creates a traditional look. Green with gold and natural brown creates a rustic style.
- Plan the hanging point. Decide which part of the frame will sit at the top so you can attach the hanging loop before decorating.
If you use fresh greenery, choose healthy branches and avoid collecting from plants or properties without permission. Make sure any foliage you use is suitable for your household, especially if children or pets might come into contact with the wreath.
How to Make a Christmas Wreath
Follow these six simple steps to create a handmade Christmas wreath with a full, balanced shape.
Step 1: Prepare the Wreath Frame
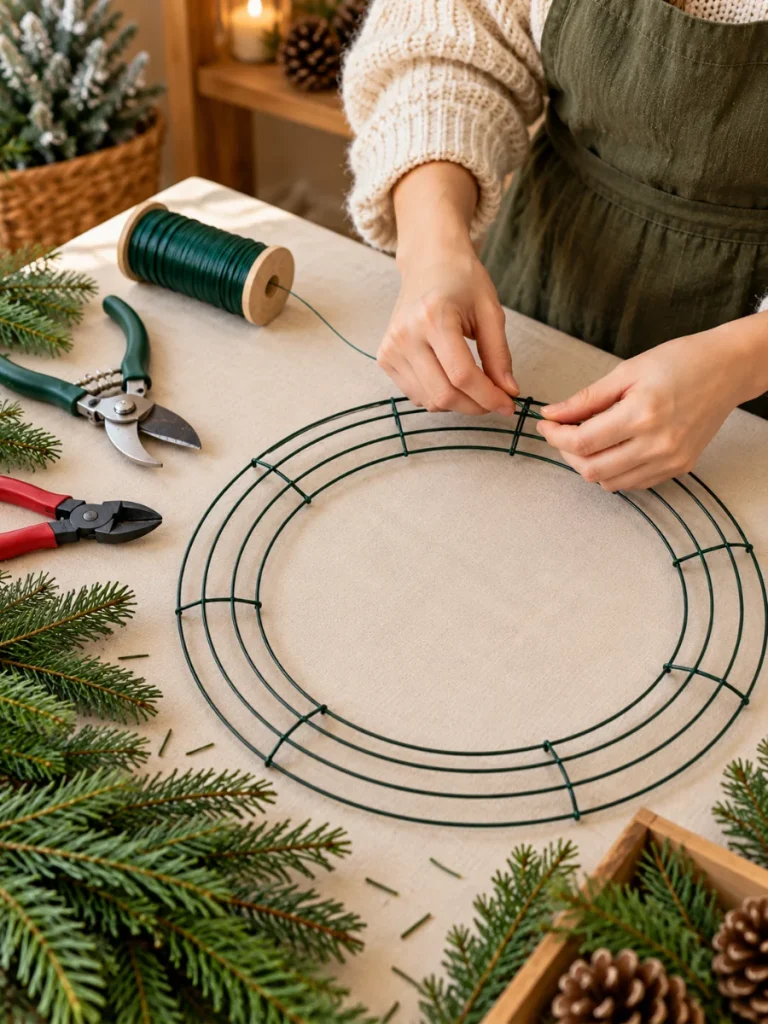
Instructions:
Place your wreath frame on a flat work surface. Decide where the top will be, then attach a hanging loop made from sturdy ribbon or wire if your frame does not already have one.
Wrap one end of the florist wire tightly around the frame to secure it. Keep the wire spool attached so you can continue wrapping the greenery bundles without repeatedly cutting new pieces.
Check that the frame sits flat and the wire is firmly attached before moving on.
Step 2: Cut and Arrange the Greenery
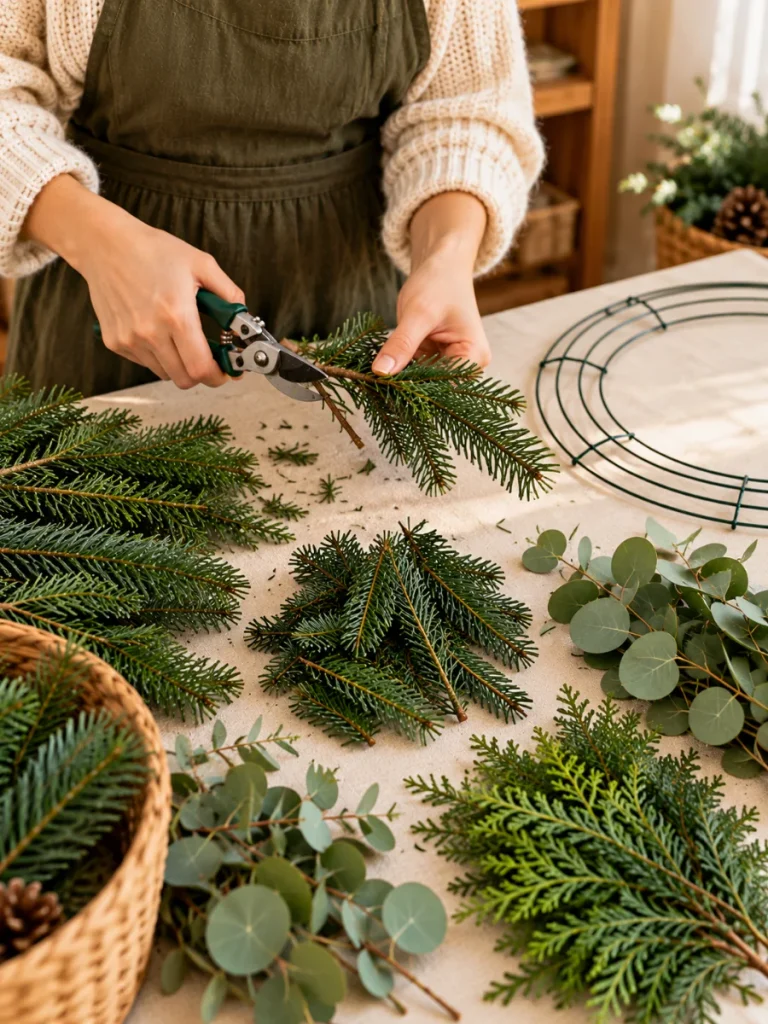
Instructions:
Cut the greenery into pieces about 5–8 inches long, adjusting the length to suit your frame. Remove damaged sections and excess leaves from the ends that will sit against the frame.
Arrange three or four pieces into a small bundle. Place the fuller tips toward one end and keep the stems together at the other.
Make several similar bundles before you start attaching them. This helps you work evenly around the wreath and makes it easier to identify gaps.
Beginner Tip: Mix different shades and textures of greenery, but keep the bundles similar in size so the wreath does not become lopsided.
Step 3: Attach the First Greenery Bundle
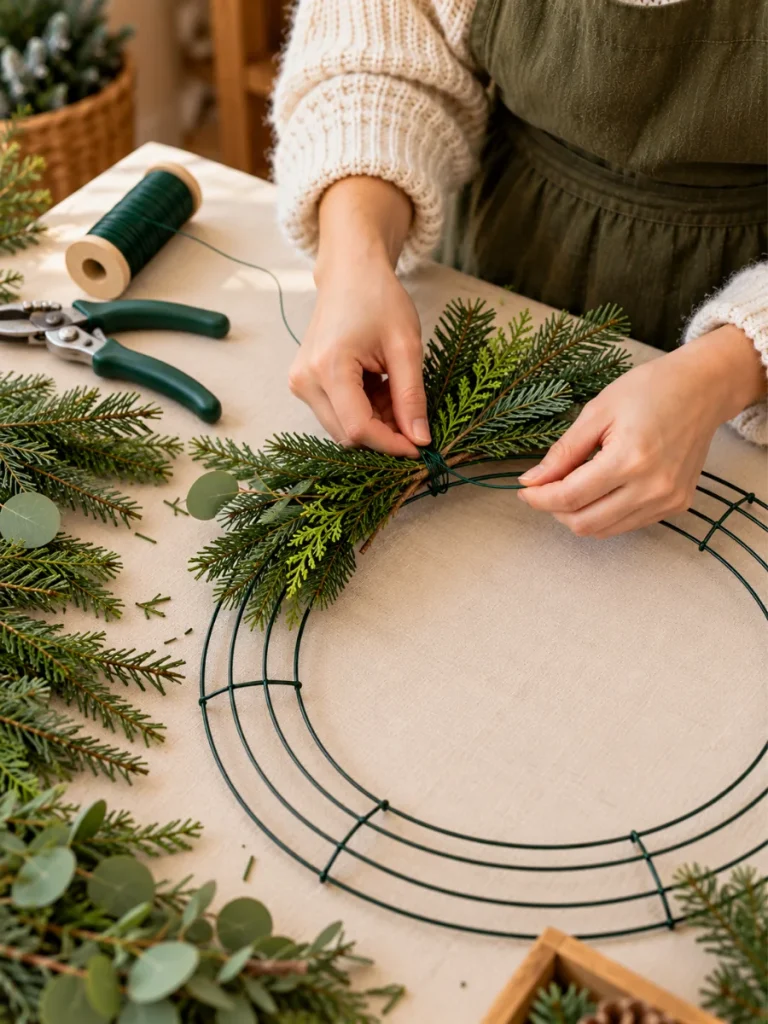
Instructions:
Place your first greenery bundle against the frame. Point the leafy ends outward and slightly along the curve of the ring, with the cut stems resting against the frame.
Wrap the florist wire around the stems and frame several times until the bundle feels secure. Keep the wire snug without crushing the branches.
Leave the wire spool attached. You will use the same wire to secure the next bundle.
Gently lift the frame to check that the greenery stays in place. If it shifts, add another wrap before continuing.
Step 4: Cover the Frame With Greenery
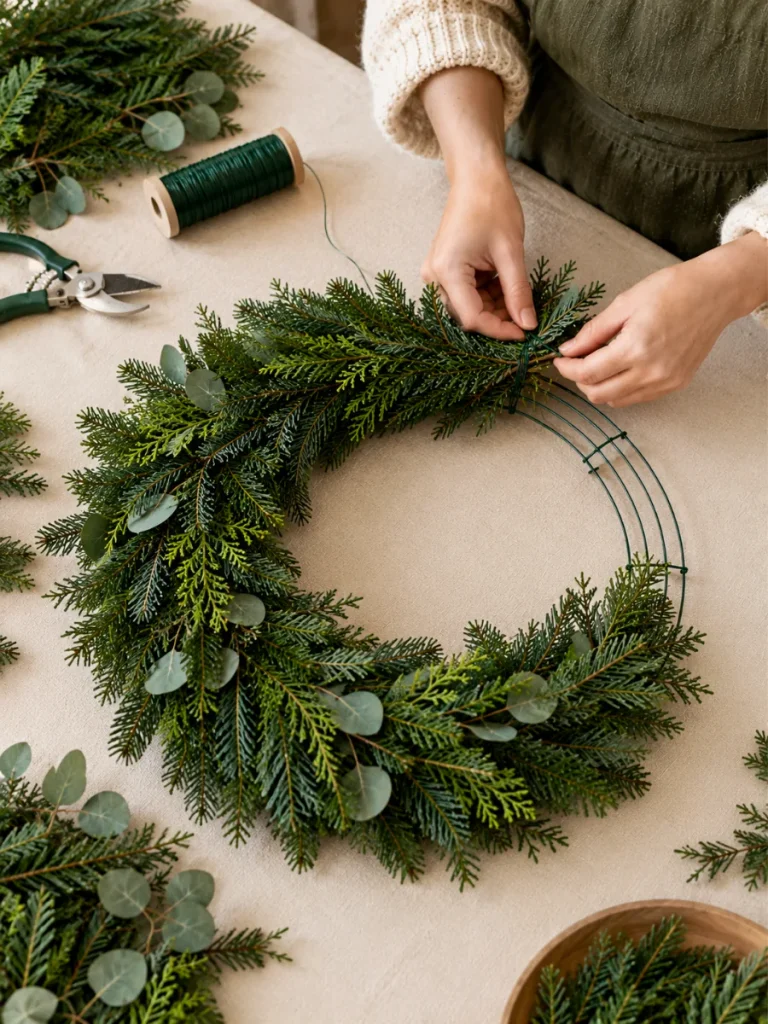
Instructions:
Add the next greenery bundle beside the first one. Angle it in the same direction and position it so the leafy tips cover the stems of the previous bundle.
Wrap the wire around the new stems and frame. Repeat this process around the entire circle, overlapping each bundle enough to hide exposed wire and metal.
Turn the wreath as you work so you can reach every section comfortably. Add smaller pieces wherever the frame shows through.
When you approach the starting point, tuck the final bundle beneath the leafy tips of the first one. This helps create a continuous, even circle.
Check the wreath from the front. The greenery should have a consistent outline, with no large empty gaps or obvious sections where the frame is exposed.
Step 5: Add Christmas Decorations
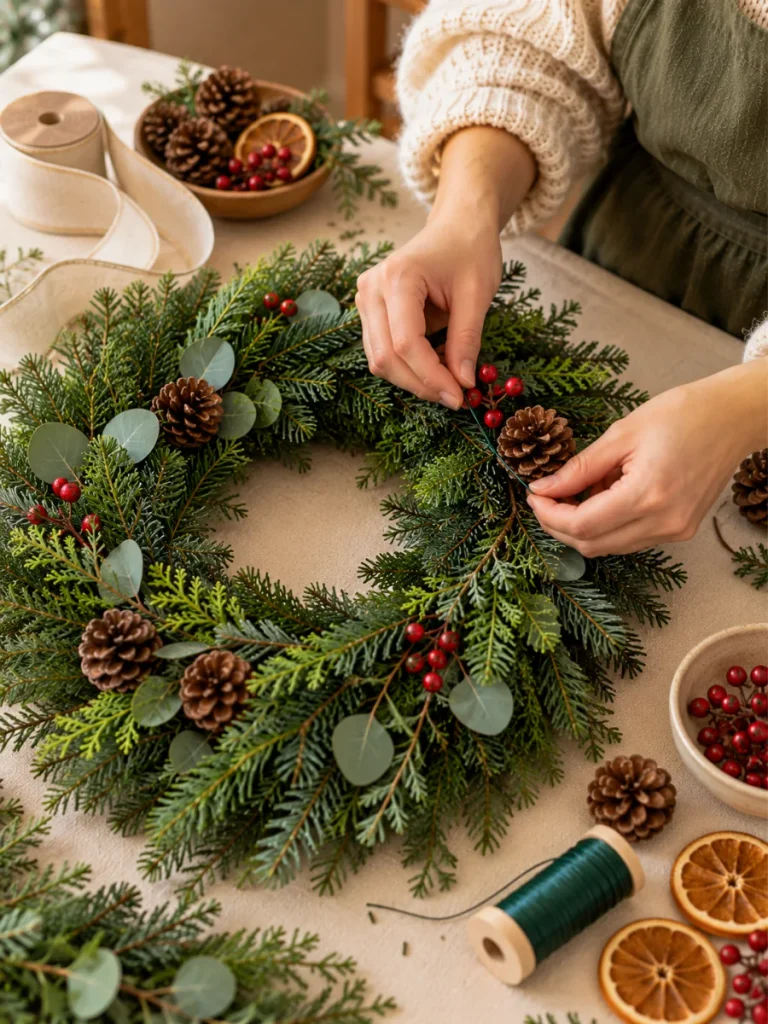
Instructions:
Lay the wreath flat and arrange your decorations before attaching them. This lets you move items around until you find a balanced design.
Start with a few larger accents, such as pine cones or clusters of artificial berries. Secure them to the frame using florist wire or suitable floral picks. Use a hot glue gun only where appropriate, particularly with compatible artificial materials.
Add smaller decorations to fill empty spaces. You can also tuck in dried orange slices or cinnamon sticks for a natural, rustic look.
Finish with a ribbon bow. Tie the bow separately, then secure it to the wreath with wire or ribbon. A top or lower-side position works well, depending on your chosen design.
Keep decorations secure and distribute heavier items evenly so the wreath hangs straight.
Step 6: Finish and Hang Your Wreath
Instructions:
Lift the wreath carefully and check the front, back, and sides. Trim any unusually long branches that stick out awkwardly, but keep some natural variation for a fuller appearance.
Make sure the wire ends are tucked away and the hanging loop is strong enough to support the wreath. Gently shake the frame to check for loose decorations, then secure any that move.
Hang your finished wreath on a suitable hook or door hanger. If you used fresh greenery, keep it away from direct heat and strong sunlight to help it stay in good condition.
Step back and check the overall shape. Move a branch or decoration if one area looks noticeably heavier than the rest.
Your homemade Christmas wreath is ready to display!
Tips for a Better Christmas Wreath
- Overlap the greenery: Position each new bundle over the stems of the previous one to conceal wire and create a continuous look.
- Keep the bundles similar: Use roughly similar amounts of greenery around the frame to avoid thin and bulky sections.
- Mix textures: Combine pine needles with softer foliage, such as suitable eucalyptus or other evergreen leaves, for visual interest.
- Choose decorations before attaching them: Arrange your pine cones, berries, and ribbon on the wreath first so you can adjust the layout.
- Use wired ribbon: Wired ribbon holds its shape more easily when you make a bow and adjust the loops.
- Secure heavy accents: Use florist wire or appropriate attachment picks for pine cones and other heavier items instead of relying on glue alone.
- Check the back: Keep wire ends tucked in and attachments close to the frame so the wreath sits neatly against a door.
- Keep fresh greenery cool: Display a natural wreath outdoors in a suitable, shaded location when possible. Warm indoor conditions can make cut foliage dry out faster.
Common Mistakes to Avoid
Visible Wire
Why it happens: The greenery bundles are too far apart or overlap too little.
How to avoid it: Cover each set of stems with the next bundle. Add small sprigs to any remaining gaps.
An Uneven Wreath Shape
Why it happens: The greenery bundles vary too much in size.
How to avoid it: Use similar-sized bundles and fill thin areas with smaller sprigs.
Loose Greenery
Why it happens: The florist wire is not wrapped tightly enough around the stems and frame.
How to avoid it: Secure each bundle firmly against the frame without crushing the branches.
Too Many Decorations
Why it happens: Every empty space gets filled with another ornament or accent.
How to avoid it: Choose a few focal decorations and leave some greenery visible.
A Drooping Bow
Why it happens: The ribbon is too soft or the bow is poorly secured.
How to avoid it: Use wired ribbon and fasten the bow firmly to the frame.
A Crooked Wreath
Why it happens: Heavy decorations sit on one side, or the hanging loop is off-center.
How to avoid it: Distribute heavier accents evenly and check the hanging balance before displaying the wreath.
Dried-Out Foliage
Why it happens: Fresh branches lose moisture in warm conditions.
How to avoid it: Choose healthy greenery and display the wreath in a cool location away from heat.
Easy Ways to Customize Your Christmas Wreath
You can change the color palette, materials, and decorations to create a wreath that suits your home.
Traditional Red and Green
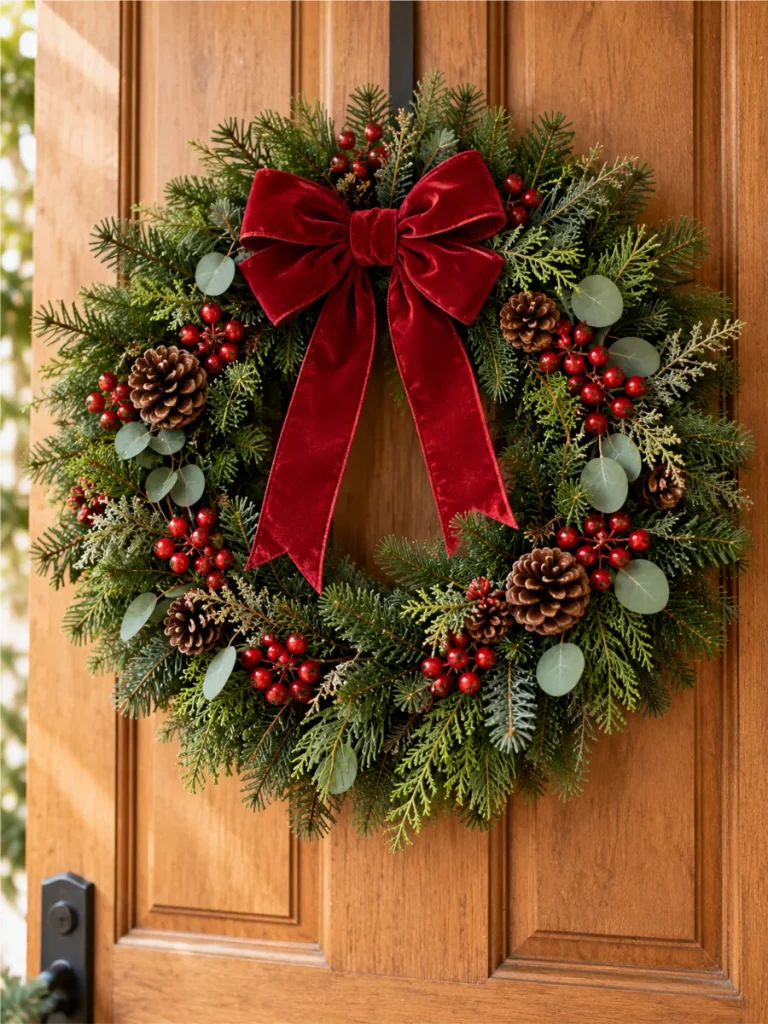
Use evergreen branches, red berries, and a red ribbon bow for a classic Christmas look. Add a few pine cones to keep the design natural.
Rustic Natural Wreath

Combine greenery with dried orange slices, cinnamon sticks, and a neutral linen ribbon. This style works well with natural wood and earthy home decor.
Gold and Cream

Add a few gold ornaments and an ivory bow. Keep the decorations simple for an elegant, understated finish.
Rustic Twig Wreath

Start with a twig or rattan base and leave some of it visible. Add small evergreen sprigs and a burlap or cotton bow for a relaxed, handmade style.
Reusable Artificial Wreath

Use artificial pine branches and lightweight ornaments. Store the wreath in a dry container after the holidays so you can reuse it in future years.
Modern Asymmetrical Wreath
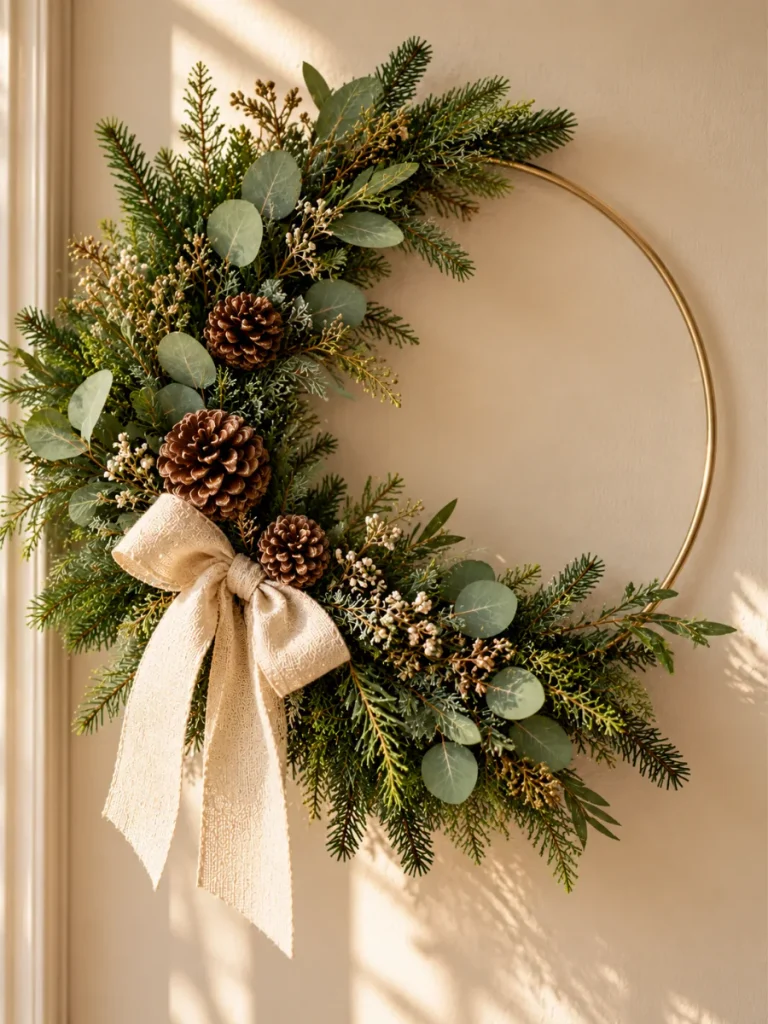
Cover only part of the frame with greenery, then cluster a few decorations on one side. This creates a lighter, contemporary design.
How to Display Your Finished Christmas Wreath
Your handmade wreath can decorate more than just your front door.
- Front door: Hang it on a sturdy wreath hook or a suitable over-door hanger.
- Living room: Display it on a wall above a console table or fireplace, keeping it away from heat sources.
- Interior door: Add a festive touch to a bedroom, hallway, or home office.
- Christmas party: Use the wreath as part of a seasonal backdrop or entryway decoration.
- Handmade gift: Make a personalized wreath for a friend or family member and choose decorations that match their style.
- Tabletop decoration: Place a wreath flat on a table as a centerpiece, provided the base and decorations sit securely. Keep candles and other heat sources away from fresh foliage and flammable materials.
For fresh wreaths, choose a suitable display location. A natural wreath generally lasts longer outdoors in a cool, shaded place than in a warm indoor room. Its lifespan depends on the foliage, temperature, and moisture.
Troubleshooting Common Wreath Problems
The Wreath Frame Is Still Visible
Add small greenery sprigs to the gaps and tuck them beneath existing branches. Check the wreath from the front rather than only from above.
The Greenery Keeps Slipping
Hold each bundle firmly against the frame while wrapping the wire. Add another wrap around the stems if needed.
The Wreath Looks Too Bulky on One Side
Trim unusually long branches and add smaller sprigs to thinner areas. Move heavy decorations toward the lighter side if that improves the balance.
The Decorations Keep Falling Off
Attach larger decorations with florist wire or suitable floral picks. For artificial materials, use an adhesive compatible with the material and follow the product instructions.
The Wreath Looks Dry After a Few Days
Move it away from direct sunlight, radiators, and other heat sources. For fresh greenery, gentle misting may help in suitable conditions, but avoid soaking decorations or materials that could be damaged by moisture.
The Wreath Does Not Hang Straight
Check the hanging loop and the distribution of heavier ornaments. Move the hanging point or reposition the decorations until the wreath balances.
Frequently Asked Questions
How Do You Make a Christmas Wreath at Home?
Attach small bundles of evergreen branches to a circular wreath frame using florist wire. Overlap the bundles until the frame is covered, then add decorations and a ribbon bow. Finish by securing the hanging loop and checking for loose pieces.
What Materials Do You Need to Make a Christmas Wreath?
The basic supplies are a wreath frame, evergreen branches or artificial greenery, florist wire, and ribbon. Pine cones, berries, dried orange slices, and other decorative accents are optional.
What Is the Easiest Way to Make a Christmas Wreath?
For beginners, the easiest approach is to use a ready-made wreath frame and attach pre-cut greenery bundles with florist wire. This avoids the extra work of building a frame from scratch.
How Long Does a Fresh Christmas Wreath Last?
A fresh wreath may last several weeks, depending on the type of greenery, temperature, and display location. Outdoor wreaths in cool conditions may stay fresh longer than those displayed in warm indoor rooms. The exact lifespan varies.
Can You Make a Christmas Wreath Without Fresh Greenery?
Yes. Artificial evergreen branches, ribbon, yarn, fabric, and other suitable craft materials can create a festive wreath. Artificial greenery is particularly useful if you want to store and reuse the wreath in future years.
How Do You Keep a Christmas Wreath Fresh?
Start with healthy greenery and keep the wreath away from direct sunlight and heat. A cool outdoor location can help extend its life. If the wreath has a moss base, follow appropriate care guidance for that base and avoid letting it become excessively dry.
Conclusion
Making a Christmas wreath at home is a simple way to add a personal touch to your holiday decor. With a basic wreath frame, greenery, florist wire, and a few favorite decorations, you can create a beautiful design that suits your style. Experiment with different colors and textures, and enjoy making a wreath of your own.
Ready to make your own Christmas wreath? Gather your supplies and give this beginner-friendly project a try. Save this tutorial for later, and explore more DIY Christmas crafts and seasonal decorating ideas on CraftedMode.