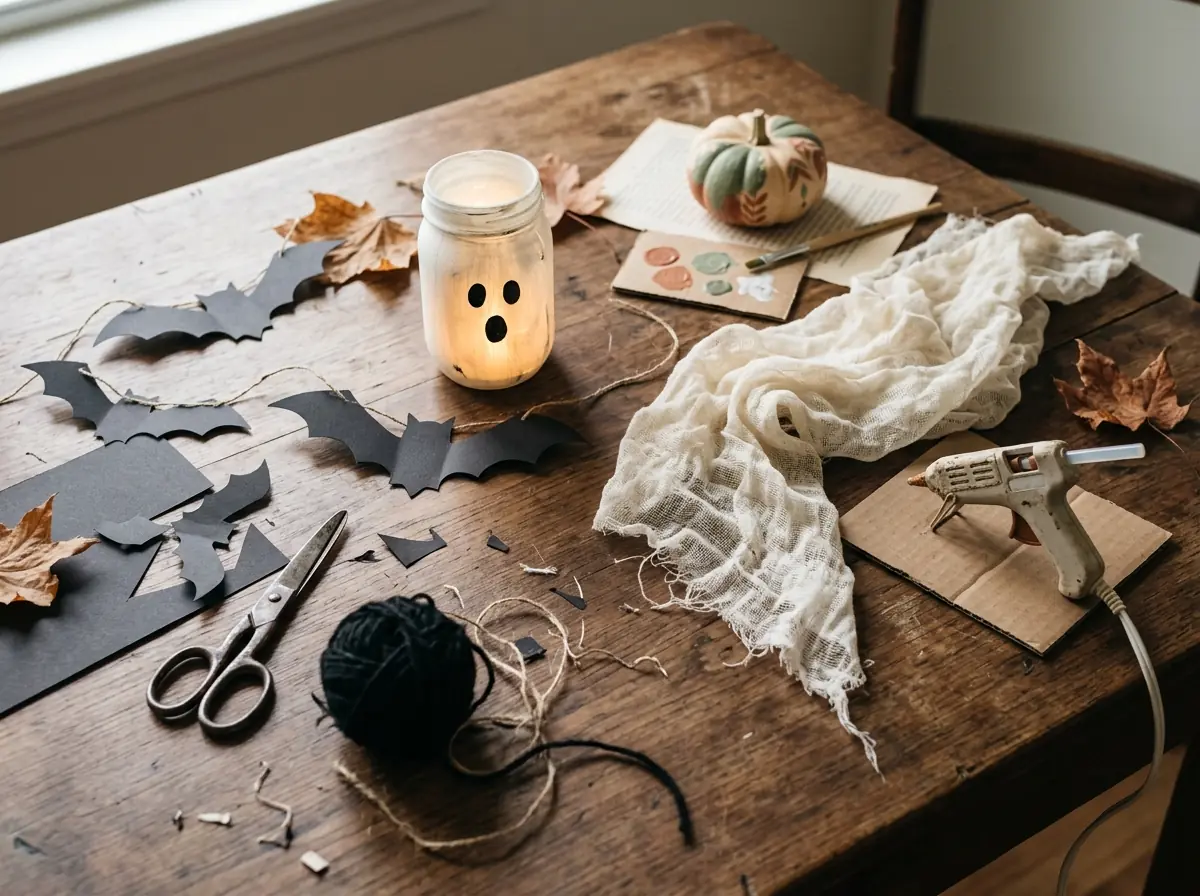
Budget-friendly DIY Halloween decorations do not need fancy supplies. Paper, cardboard, old jars, yarn, and a few dollar store items can cover most of your spooky decor. Many of these projects take under an hour, so you can start this evening and decorate by tomorrow.
This list covers 28 ideas for porches, windows, mantels, tables, and walls. You will find paper crafts, jar lanterns, no-carve pumpkins, and easy spooky props. Each idea lists the materials you need and tells you how beginner-friendly it is, so you can pick fast.
Planning more projects? You may also like our Halloween costume ideas for adults and kids and creative jar crafts.
Budget-Friendly DIY Halloween Decorations to Make Tonight
Each idea below uses low-cost or recycled materials and works for beginners.
1. Paper Bat Wall Swarm
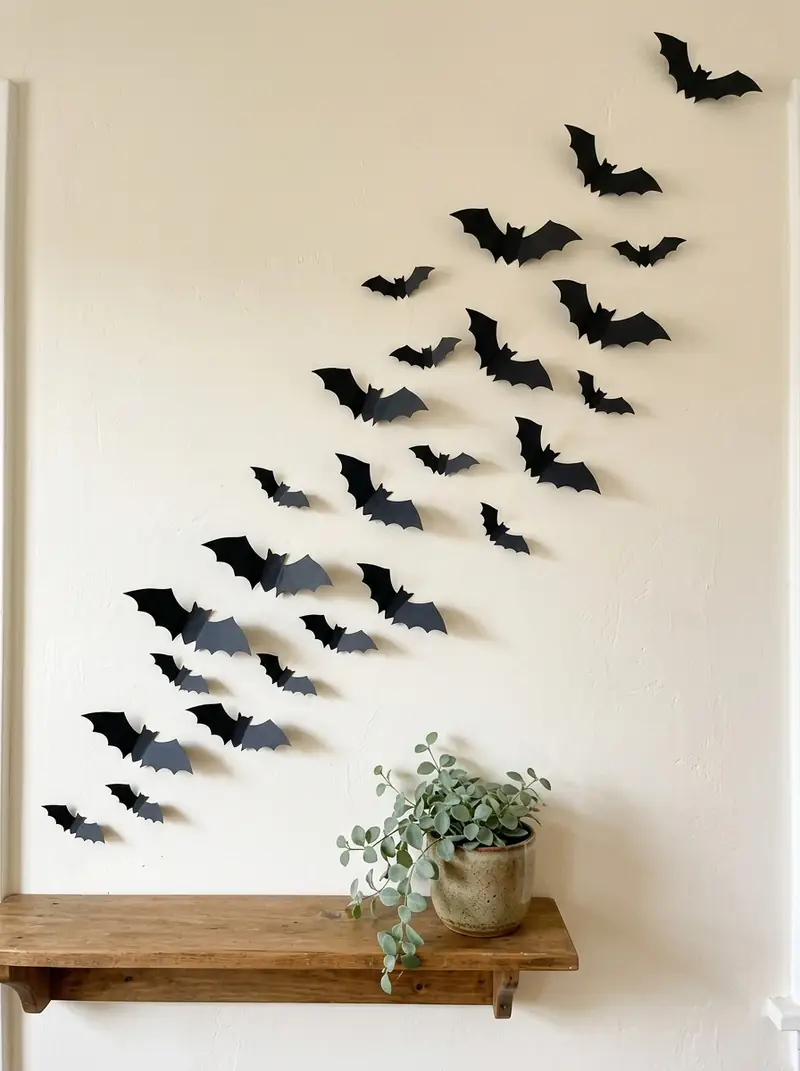
A bat swarm is one of the cheapest ways to cover a big wall. All you need is black cardstock, scissors, and tape or removable putty. Trace one bat shape, then cut several in different sizes.
Fold the wings slightly so each bat lifts off the wall. Place them in a curved line, from large to small, to create movement. Cereal box cardboard painted black works too.
2. Mason Jar Ghost Lanterns
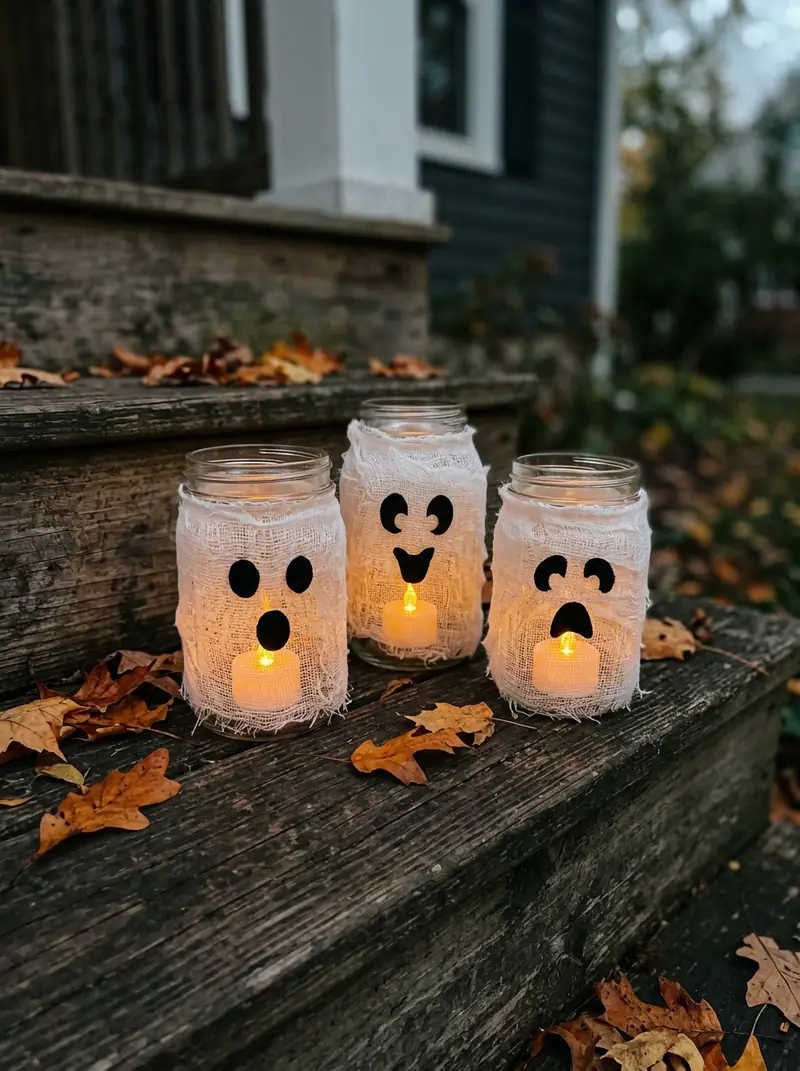
Mason jars make quick ghost lanterns. Wrap a jar in white cheesecloth or a thin white fabric scrap. Secure it with twine, then glue on felt eyes and a mouth.
Use a flameless LED tea light inside. Skip real candles, since cloth and flame do not mix. Group three jars together for a stronger look.
3. Toilet Paper Roll Mummies
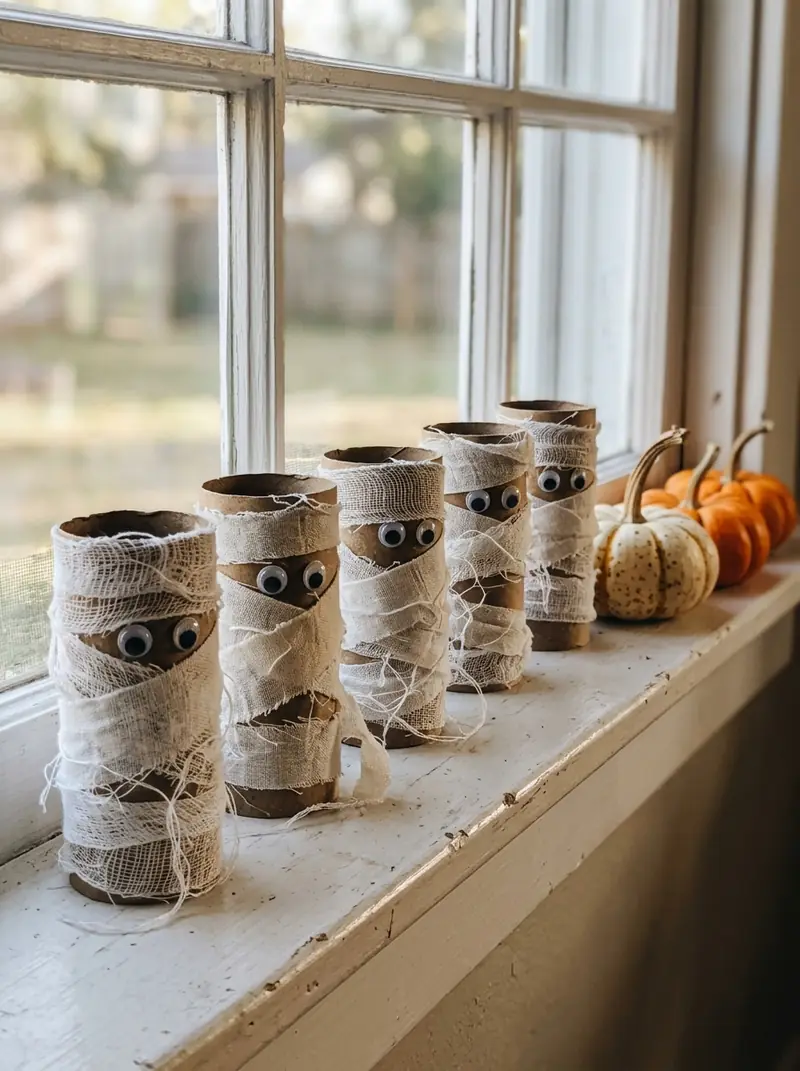
Empty toilet paper rolls become cute mummies with a few strips of white fabric. Wrap the tube in layers, leaving a small gap for the eyes. Glue on googly eyes and you are done.
This is a great project for kids. It uses items you already have at home. Make a row of them for a mantel or windowsill.
4. Cheesecloth Ghosts
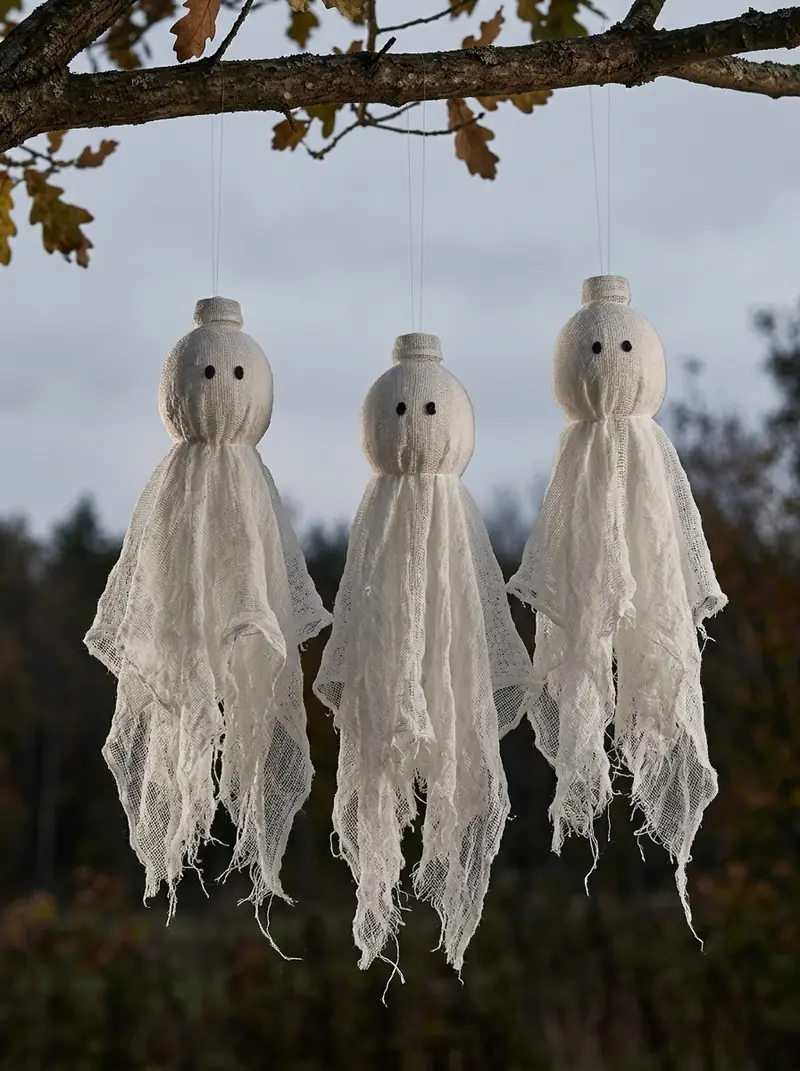
Cheesecloth ghosts look ghostly and cost very little. Drape cheesecloth over a balloon, bottle, or foam ball. Brush on diluted fabric stiffener or liquid starch and let it dry.
Remove the form and you have a floating ghost shape. Hang it from a tree, porch, or doorway with clear thread. Drying can take several hours, so start early.
5. Black Cat Window Silhouettes
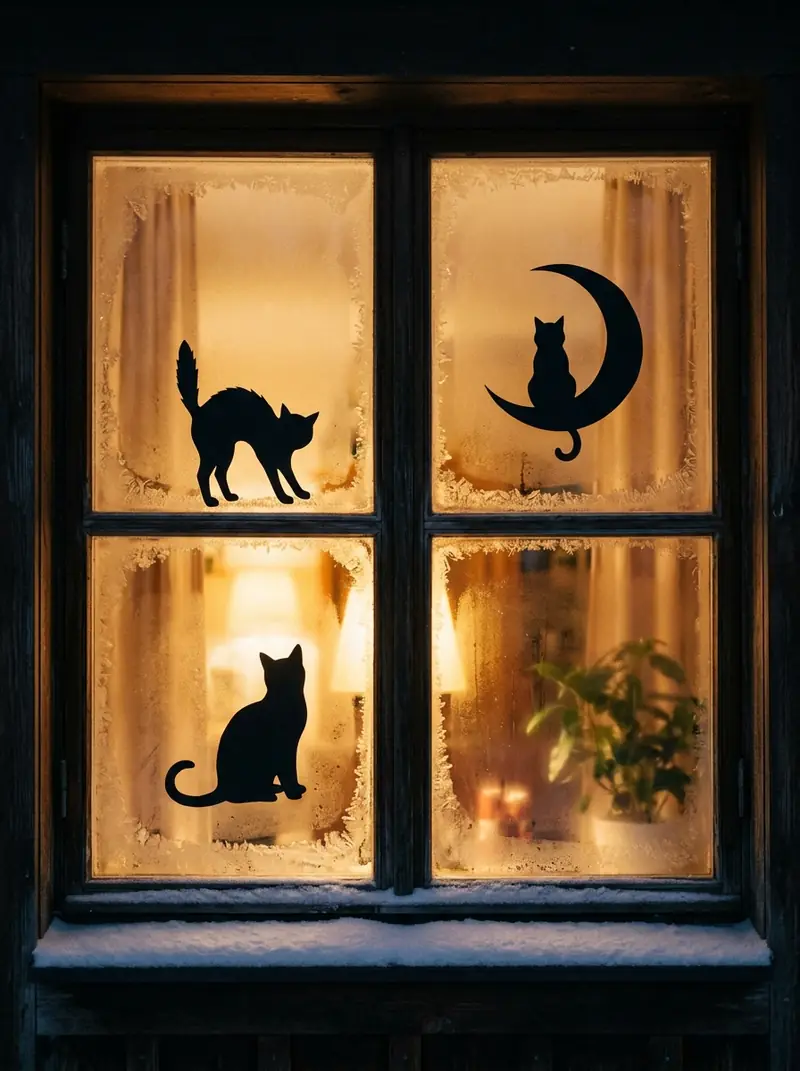
Black paper silhouettes look sharp against a window. Cut cat shapes from black cardstock or construction paper. Add a moon, a tree branch, and a few bats for a full scene.
Tape them to the glass from the inside. They show up best at night with a lamp on. You can reuse them next year.
6. Yarn Spiderweb

A yarn spiderweb costs almost nothing if you already own yarn. Tie white or gray yarn around nails, hooks, or the corners of a doorway. Start with the main lines, then loop in a spiral.
Stretch the yarn gently for clean lines. Add a small spider in the middle. Cotton yarn holds its shape better than fuzzy yarn.
7. No-Carve Painted Pumpkins
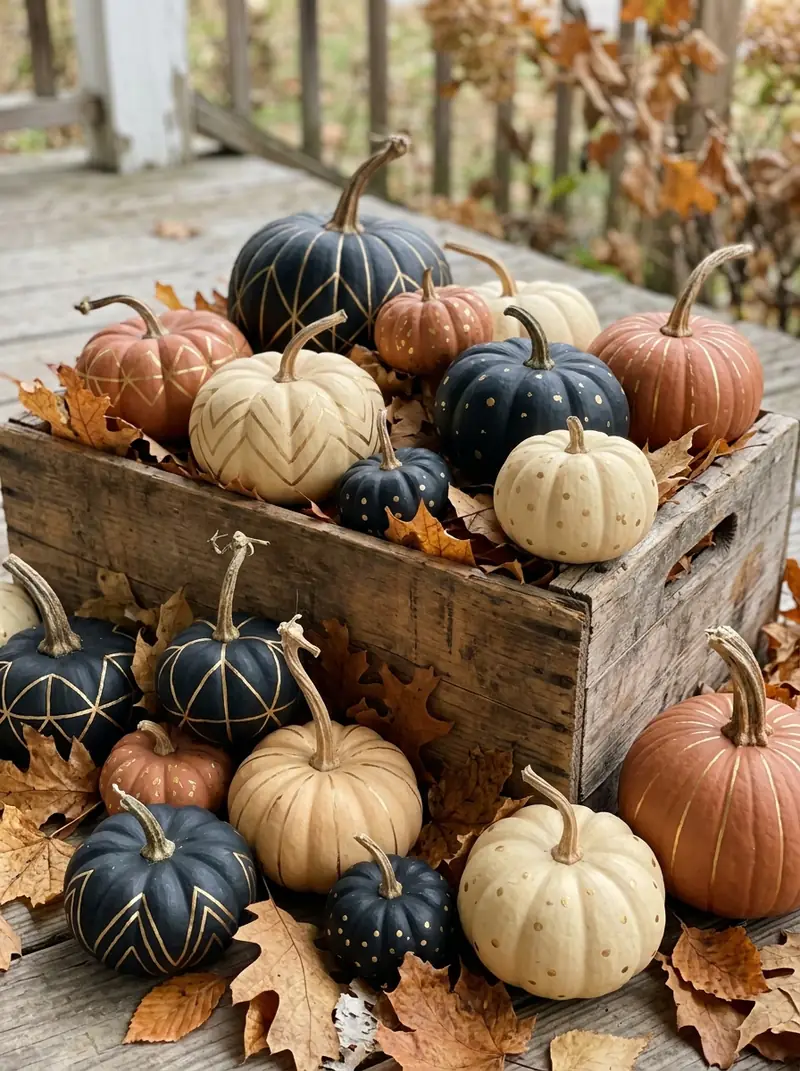
Painted pumpkins last longer than carved ones. Use acrylic paint on real or craft pumpkins. A matte black base with simple patterns looks modern and polished.
Try polka dots, stripes, or a ghost face. Let each coat dry before adding details. Painted pumpkins also stay clean, so they work well indoors.
8. Milk Jug Ghost Lights
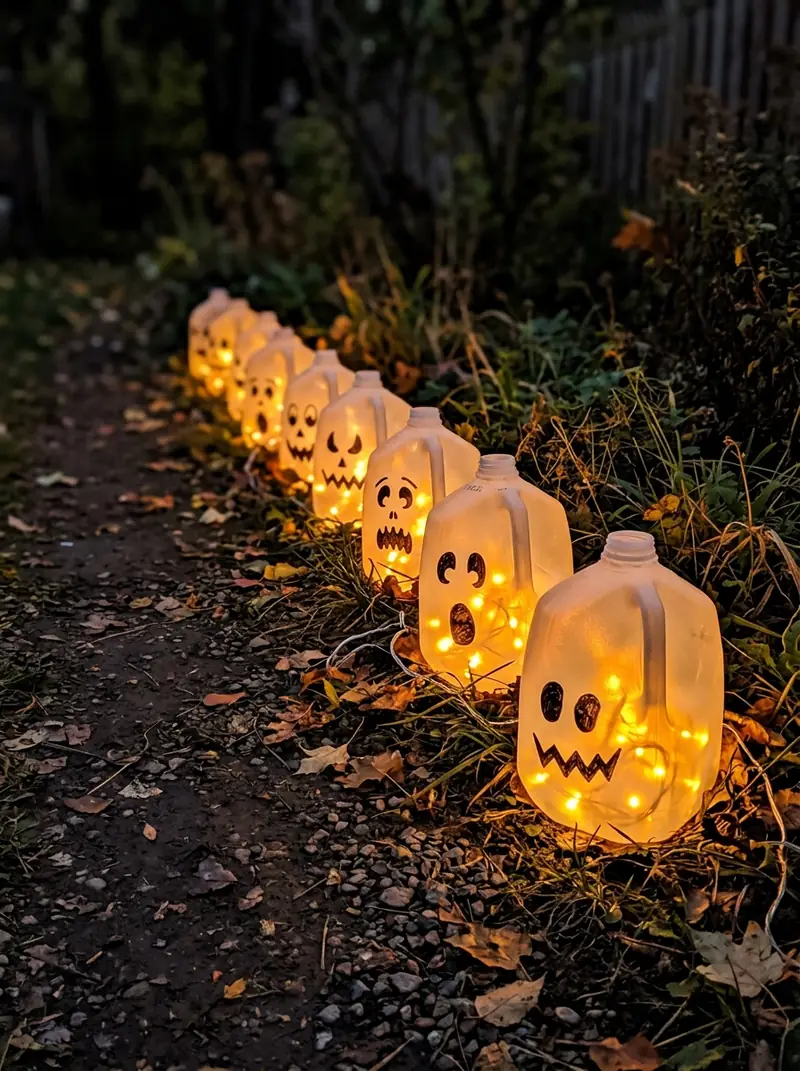
Empty milk jugs glow beautifully from within. Wash and dry each jug. Draw a ghost face with a permanent marker and place a string of battery LED lights inside.
Cut a small hole at the back for the cord or battery pack. Line several jugs along a walkway. Use only LED lights, not candles, in plastic.
9. Tin Can Monster Luminaries
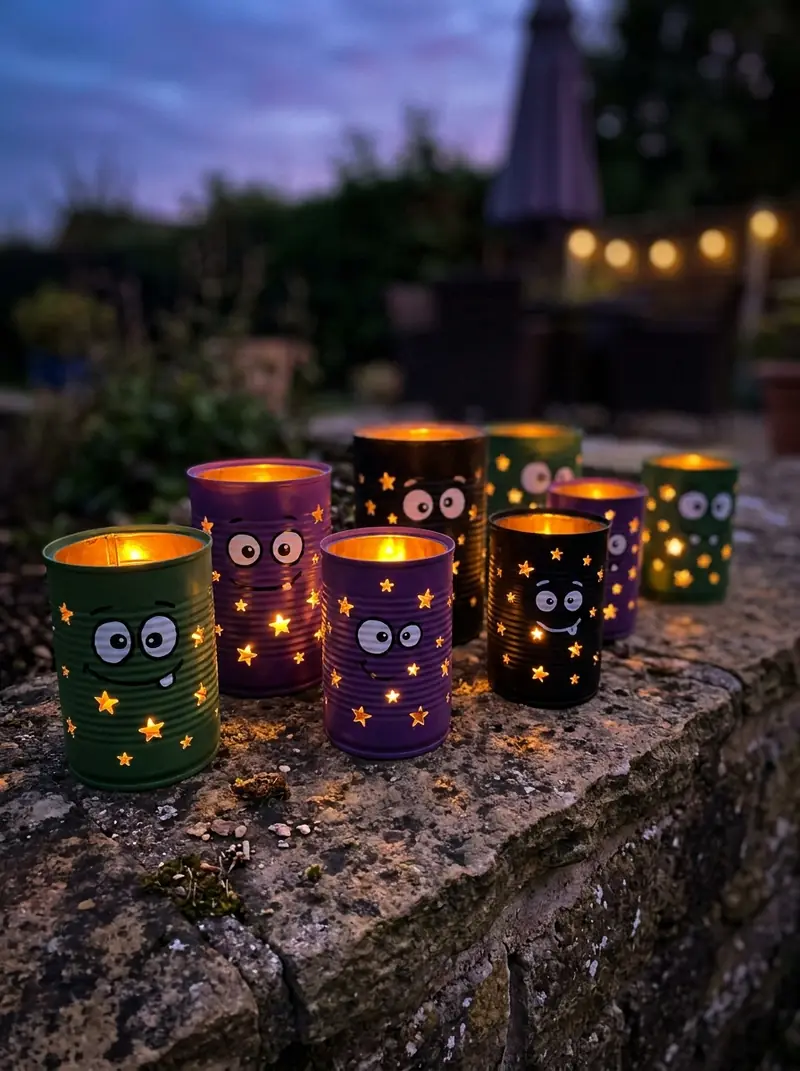
Tin cans make strong lanterns. Fill a can with water and freeze it. Then punch holes with a hammer and nail. The ice keeps the metal from bending.
Paint the can in a monster color and add eyes. Place an LED tea light inside. Smooth any sharp edges with pliers first, and keep this project for adults or older kids.
10. Foam Tombstones
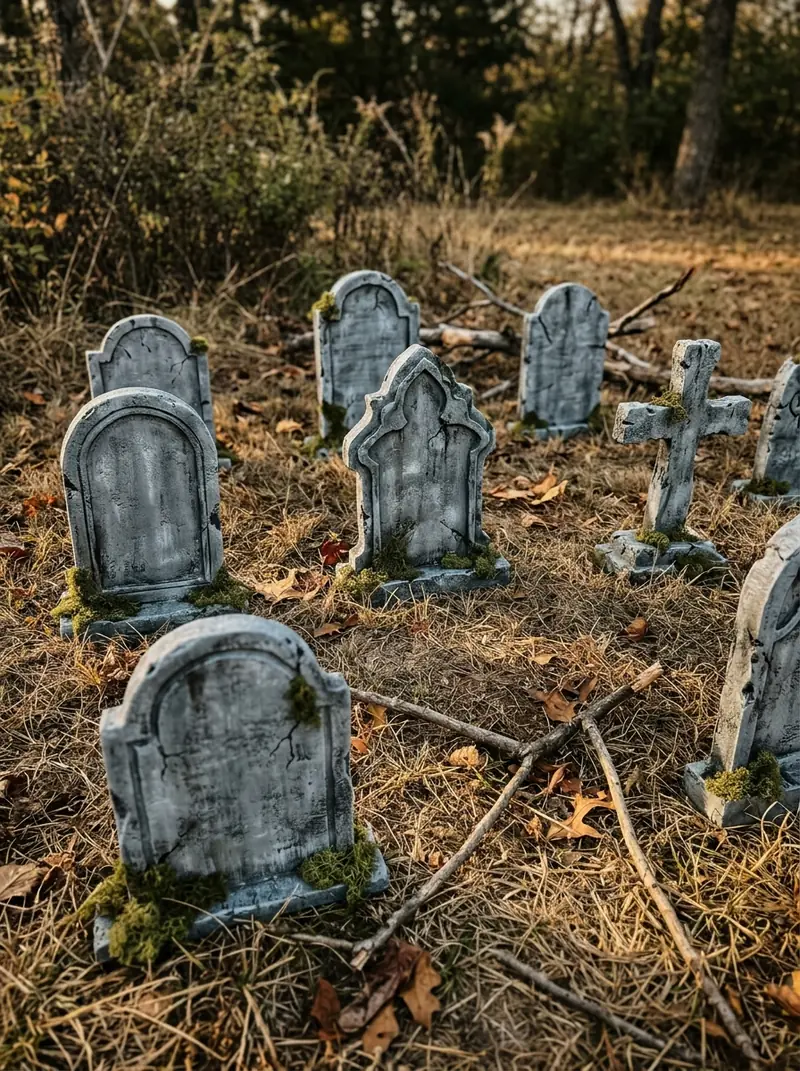
Craft foam or insulation board turns into easy tombstones. Cut rounded tops, cross shapes, and chunky slabs. Paint them gray, then dab on darker shades for age.
Press in a few stones or add moss for texture. Push wooden skewers into the base to stake them in the lawn. These handle light rain better than cardboard.
11. Tea-Stained Spellbook Pages
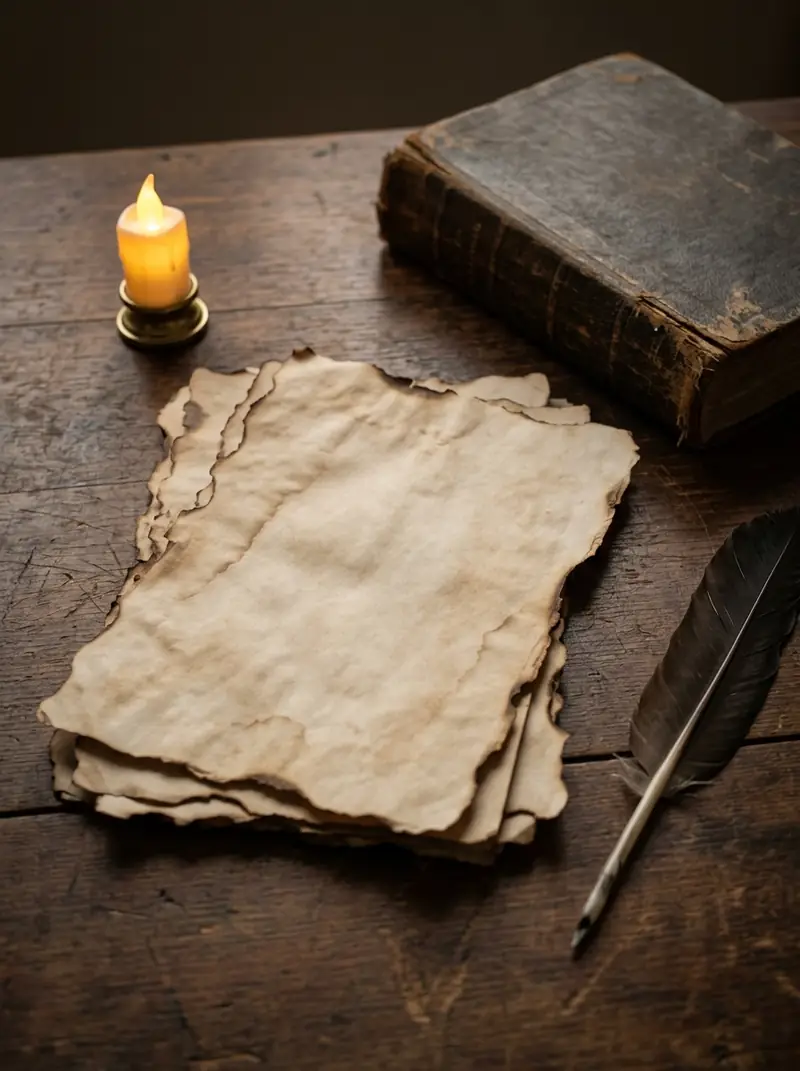
Tea-stained paper gives you an old, magical look for almost nothing. Brush strong black tea on plain printer paper. Let it dry, then tear the edges.
Use the pages as wall art, book covers, or table decor. Wrap old books in dark paper to make a stack of spellbooks. Pair them with candles on a mantel.
12. Potion Bottles from Recycled Jars
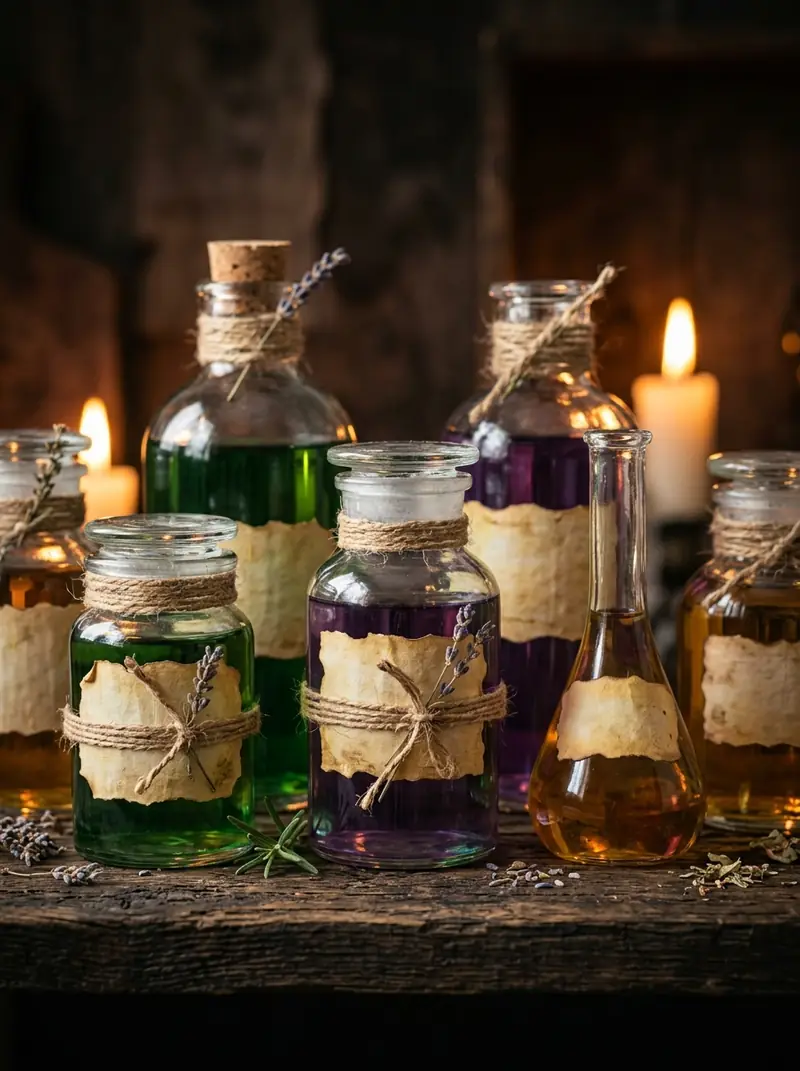
Recycled jars make charming potion bottles. Soak off old labels and fill with water and food coloring. A few drops of glitter or dried herbs add depth.
Wrap the neck with twine or lace. Use sealed lids so liquid stays put. They look great on a shelf, a bar cart, or a dinner table.
13. Pipe Cleaner Spiders
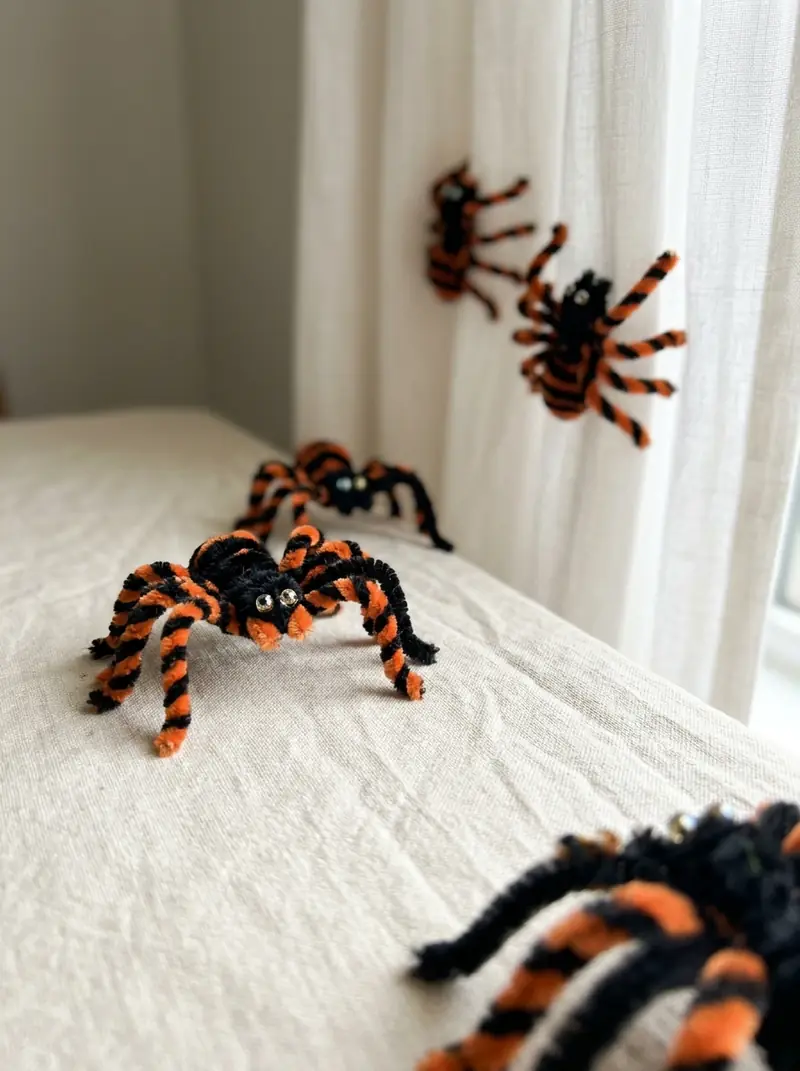
Pipe cleaners make cute spiders in minutes. Twist two pieces together for the body and bend four legs on each side. Add small pom-poms for a rounder look.
Make a bunch in different sizes. Scatter them across tables, shelves, or curtains. Keep small pieces away from toddlers and pets.
14. Paper Plate Spooky Wreath
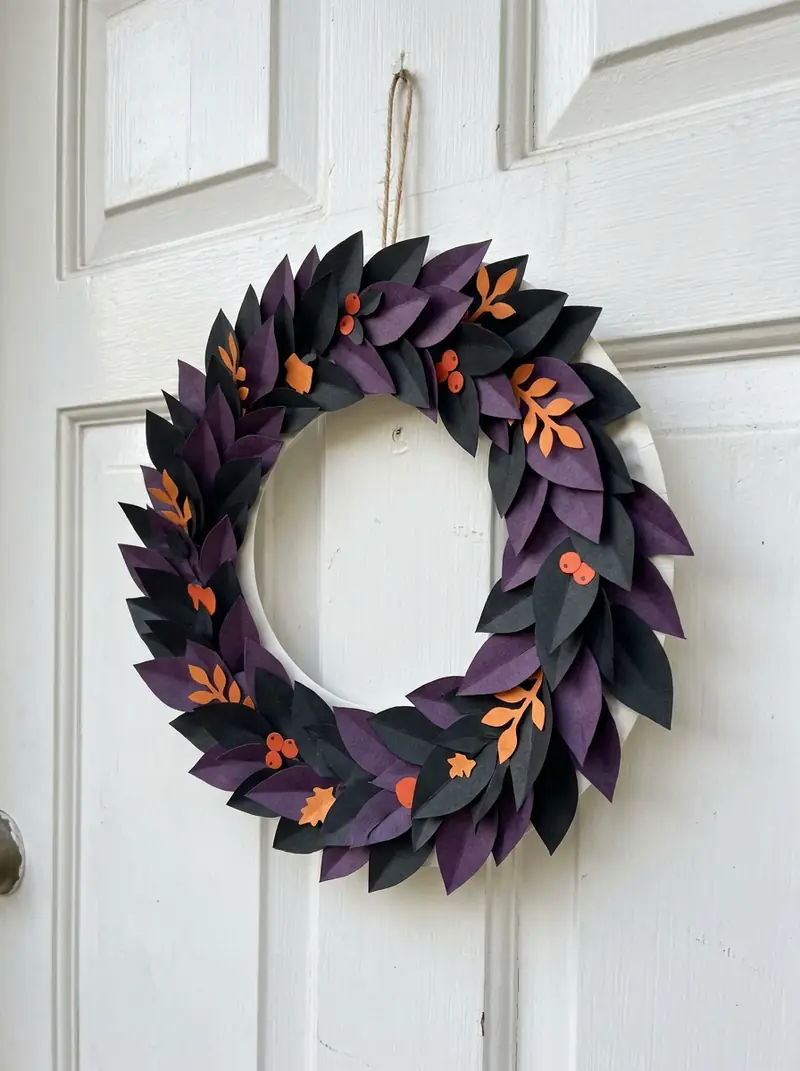
A paper plate makes a light wreath base. Cut out the center and paint the ring black. Glue on paper leaves, bats, or spooky flowers.
Keep the colors limited to three or four for a clean look. Add a ribbon loop at the back to hang it. This wreath works best indoors or on a covered porch.
15. Paper Bag Jack-o’-Lantern Lanterns
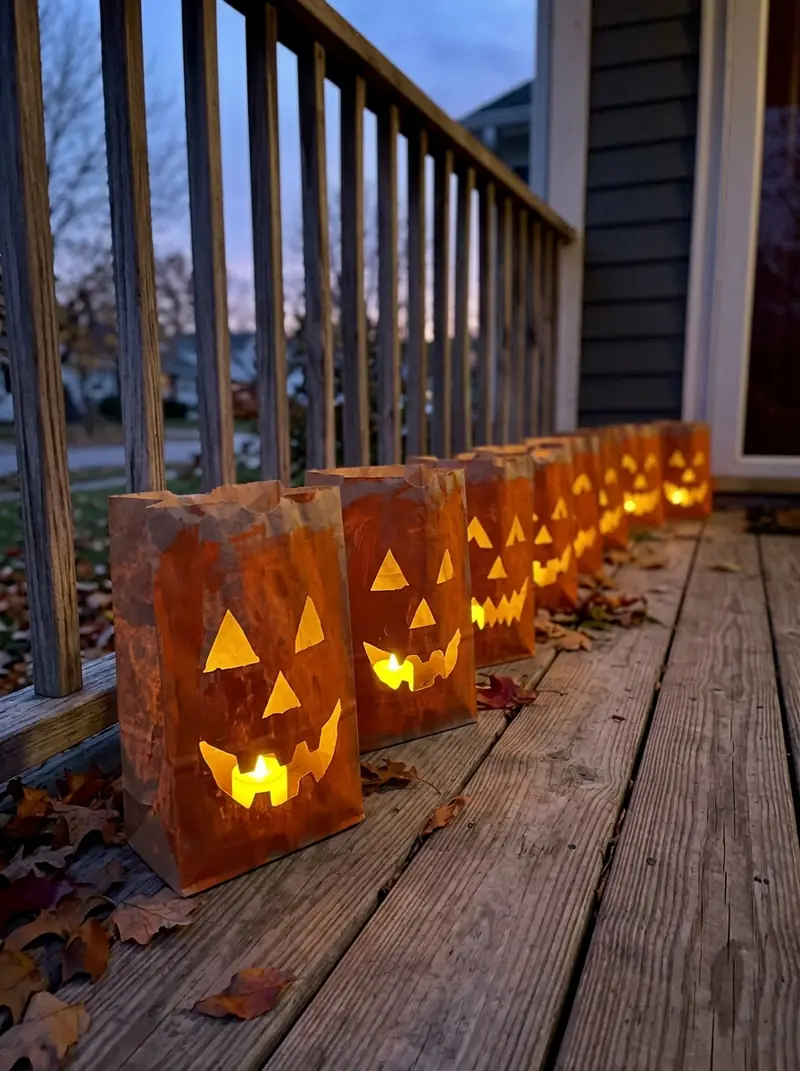
Paper bag lanterns are fast, cheap, and fun for kids. Paint a lunch bag orange or leave it brown. Cut out a face with scissors or a craft knife.
Place a battery LED light inside the bag. Add a few pebbles at the bottom to keep it steady. Never use a real flame in a paper bag.
16. Floating Witch Hat Display

Floating witch hats make a strong entryway display. Roll black cardstock into a cone and add a round brim. Wrap a ribbon around the base for a classic look.
Hang each hat at a different height using clear thread. The varied levels create a magical feel. Hang them where people will not bump their heads.
17. Haunted House Silhouette Banner
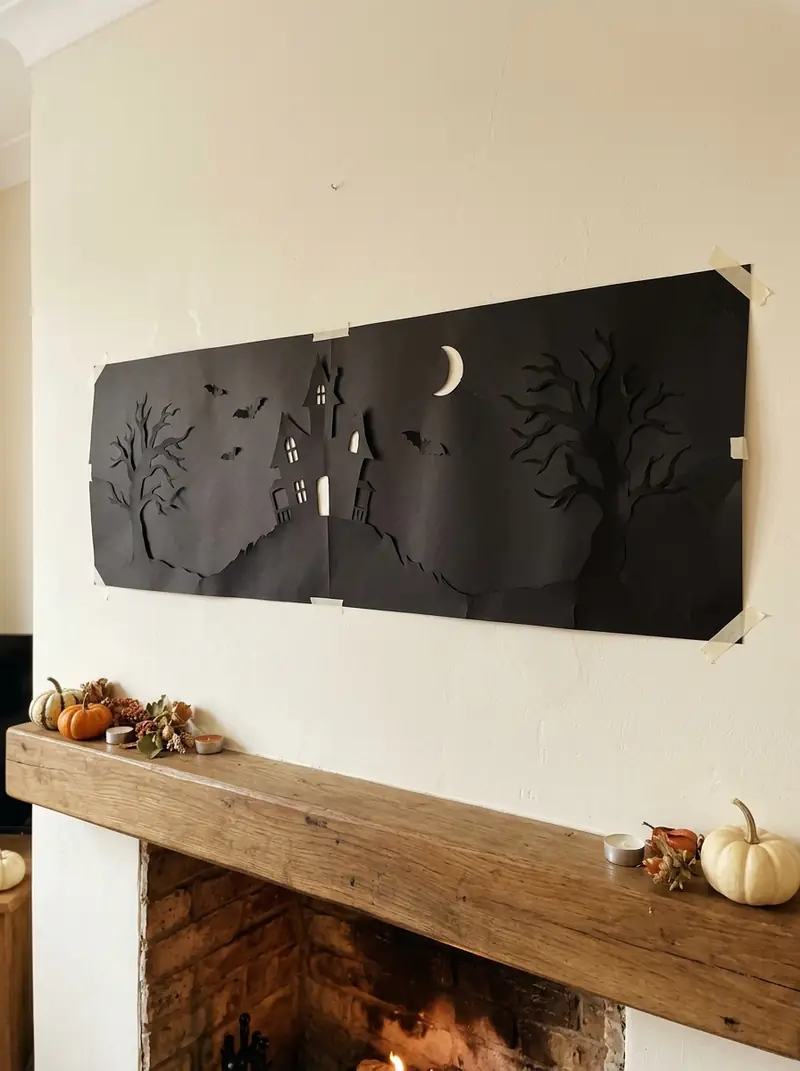
A black paper banner gives you a dramatic scene on a small budget. Cut a haunted house, trees, and a moon from black paper. Glue them onto a long strip of orange or cream paper.
Tape the banner to a wall, mantel, or window. The high contrast makes it easy to see from far away. Layer the shapes for more depth.
18. Painted Rock Monsters
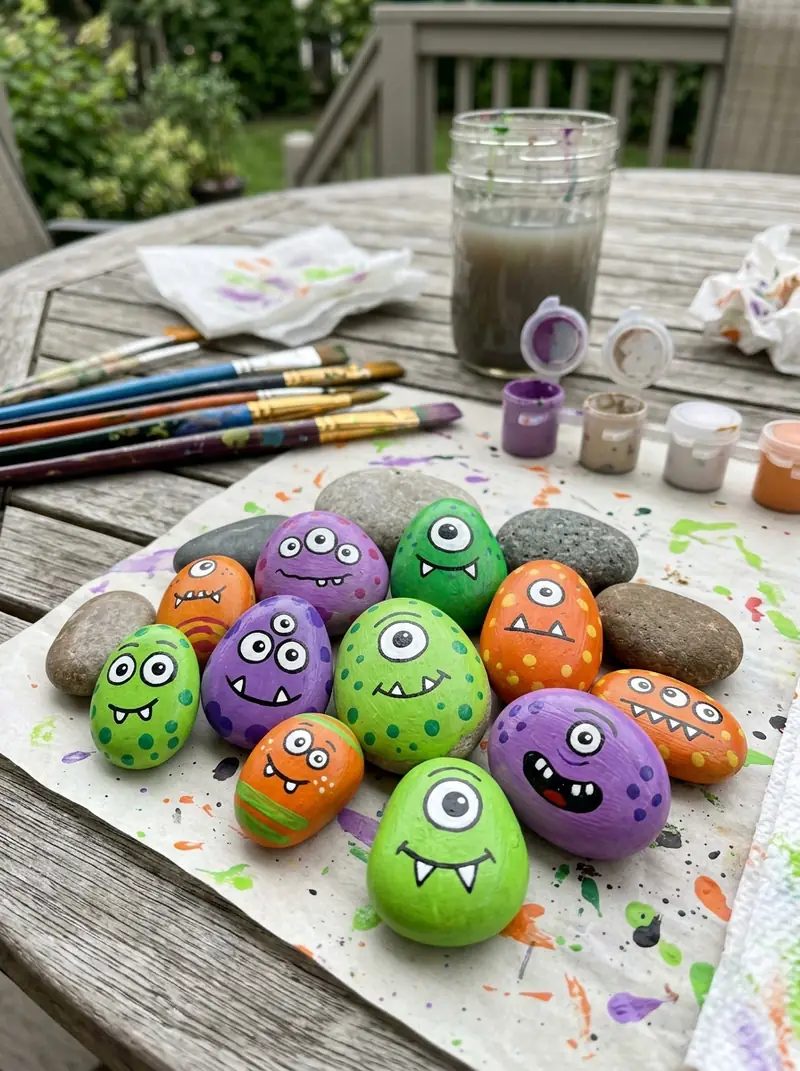
Rocks are free and great for painting. Wash and dry them first. Paint a base coat, then add eyes, teeth, and fun details.
Seal them with a clear spray if they will sit outdoors. Use them as table decor, party favors, or garden friends. This is a calm, simple project for kids.
19. Glowing Eyes in the Bushes

This classic prop is easy and effective. Cut two eye holes in a cardboard tube and paint the inside black. Place a small LED light inside to make the eyes glow.
Hide the tubes in bushes or behind plants. Use warm or yellow lights for a creepy look. Keep the wiring away from rain and damp ground.
20. Cardstock Skeleton Garland
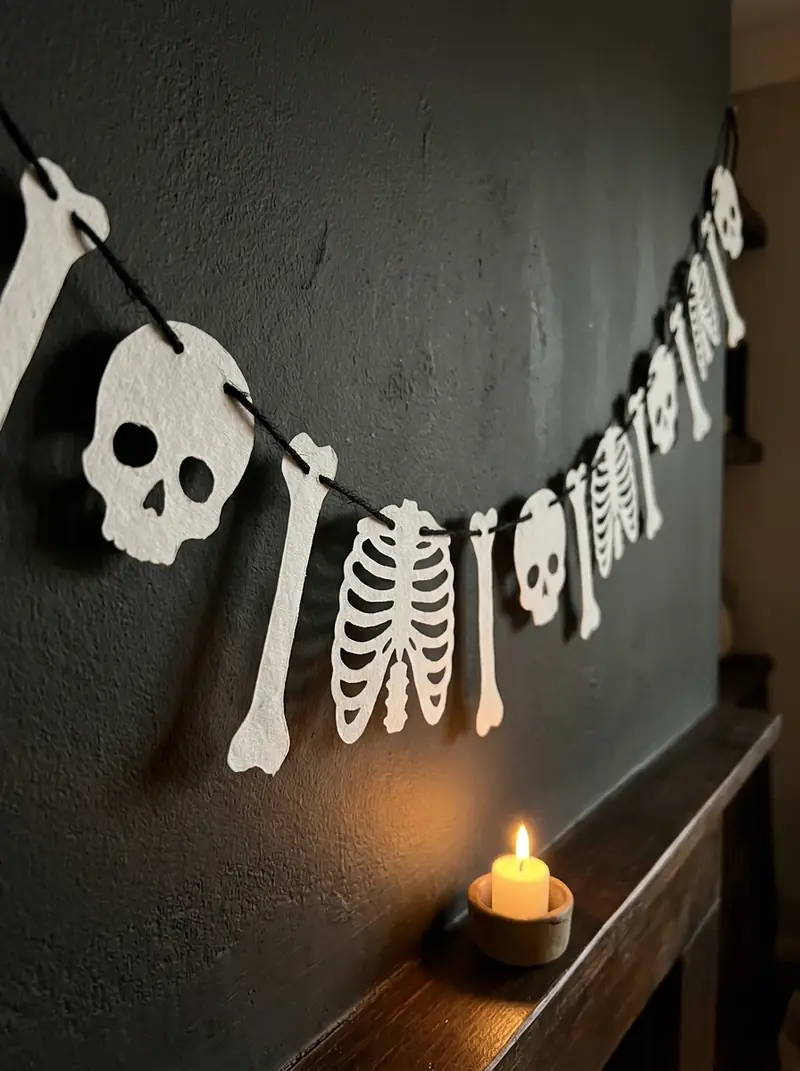
A skeleton garland is a nice change from bats. Cut bones, ribs, and skulls from white cardstock. Punch small holes and thread them on twine.
Hang it across a doorway, shelf, or staircase. Mix shapes so the garland feels full. Keep the colors simple for a clean look.
21. Sock Pumpkins

Old socks turn into soft pumpkins. Fill a sock with rice or stuffing and tie off the top. Wrap bands around the middle to shape the sections.
Add a cinnamon stick or twig for the stem. Use orange, white, or gray socks for variety. These look great on shelves and tables.
22. Ping Pong Ball Eyeball Garland
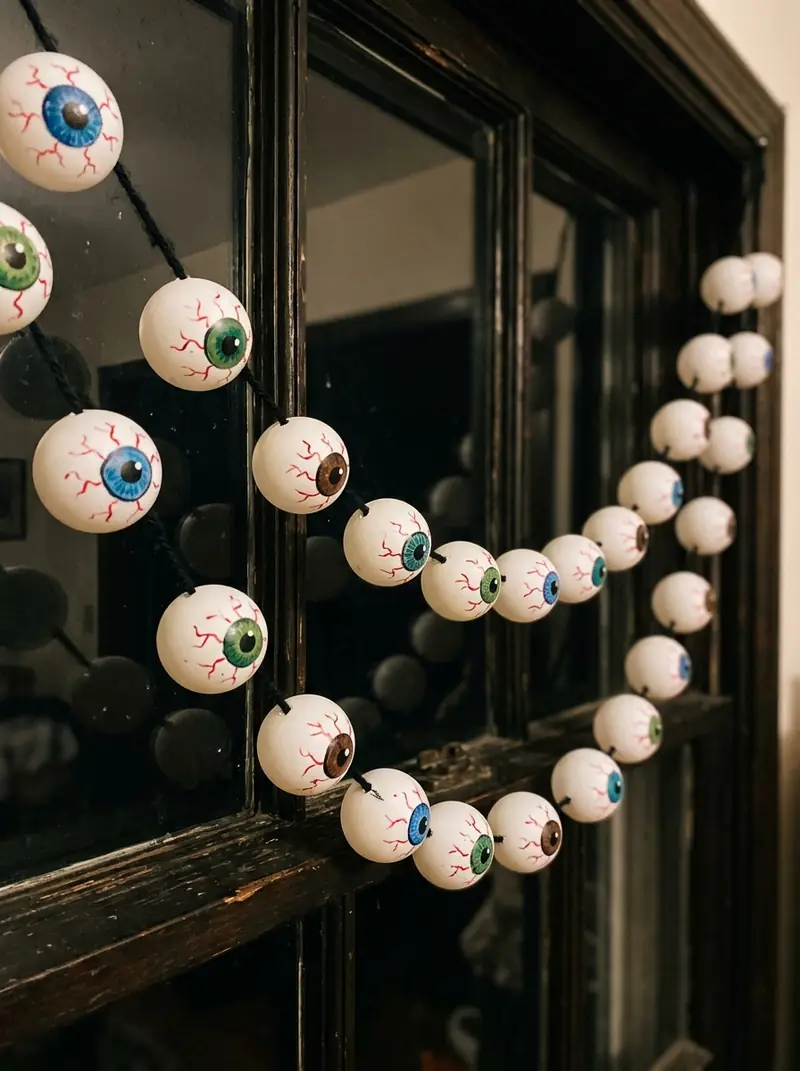
Ping pong balls become creepy eyeballs with a marker and paint. Draw an iris and pupil, then add thin red veins. Make a hole and thread them on string.
Hang the garland in a window or on a wall. Cotton balls with a black center also work. A pack of ping pong balls usually costs very little.
23. Felt Candy Corn Garland
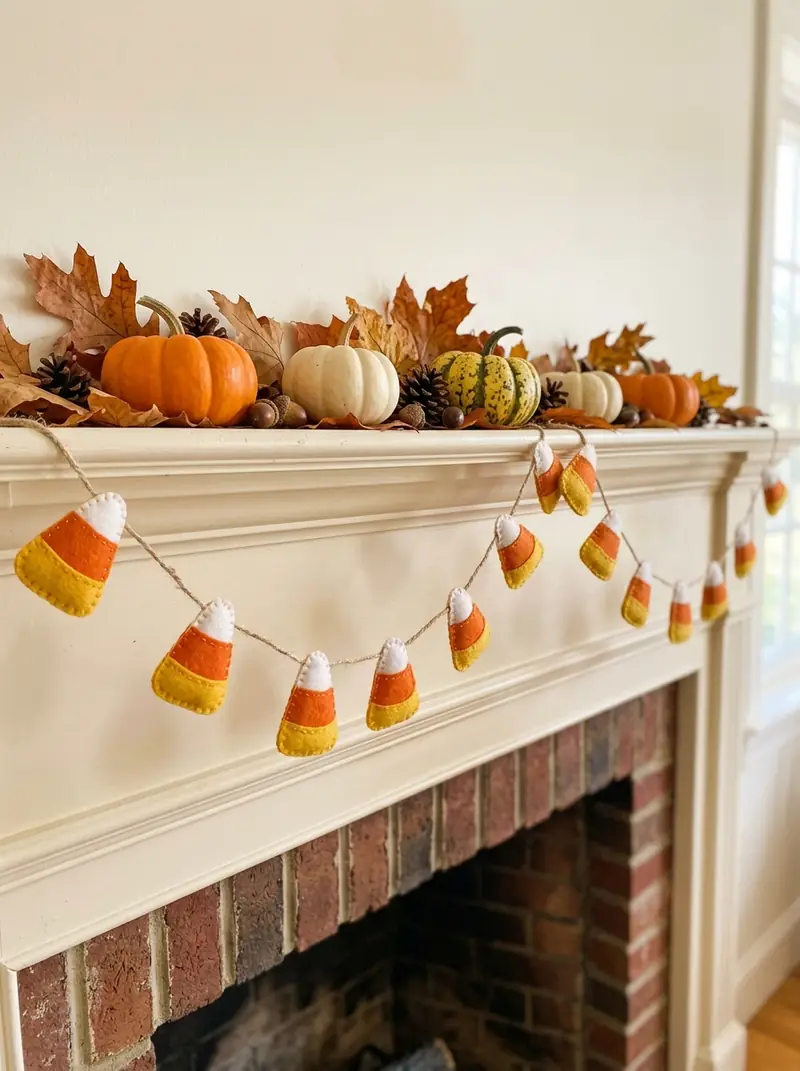
Felt is cheap and easy to cut. Cut triangle shapes in three colors and stack them into candy corn pieces. Glue or stitch them together.
String the pieces on twine for a bright garland. This is a gentler, less spooky idea, good for kids and fall parties.
24. Paper Doily Spiderwebs
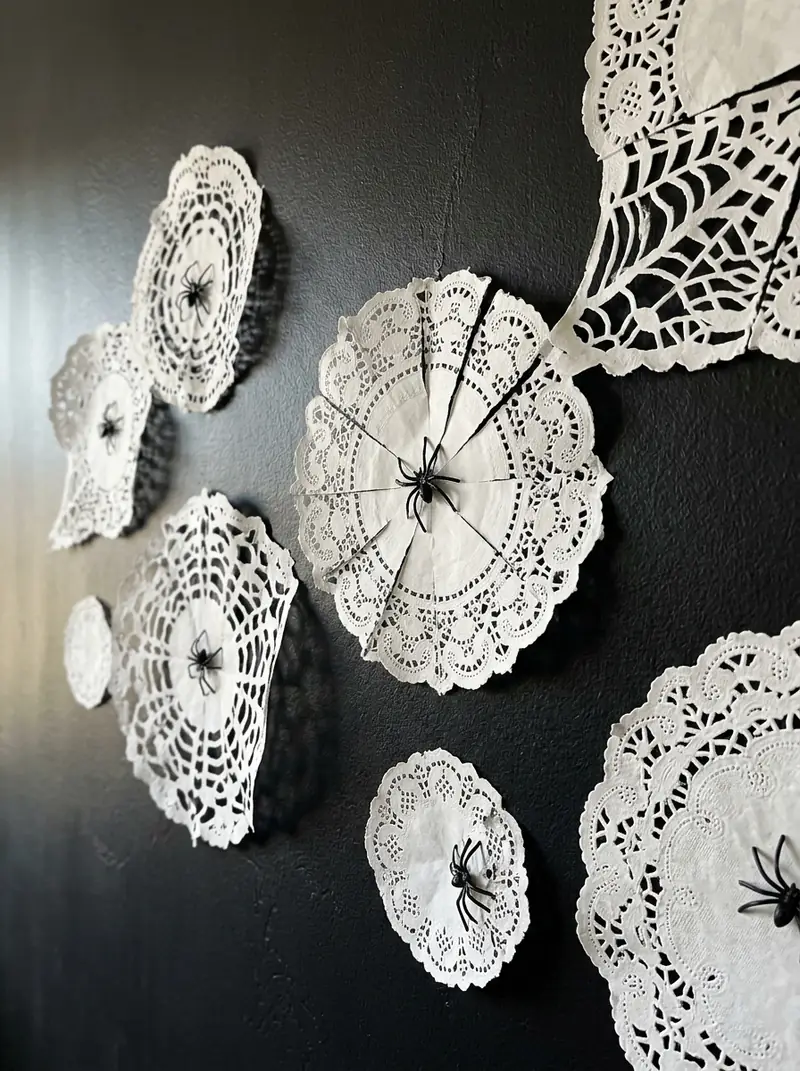
Paper doilies already look like webs. Cut a wedge out of each one to open the pattern. Tape them to a wall or window in a group.
Add small paper spiders for contrast. White on black pops best. Doilies are cheap and easy to find in craft stores.
25. Spooky Tree Branch Centerpiece
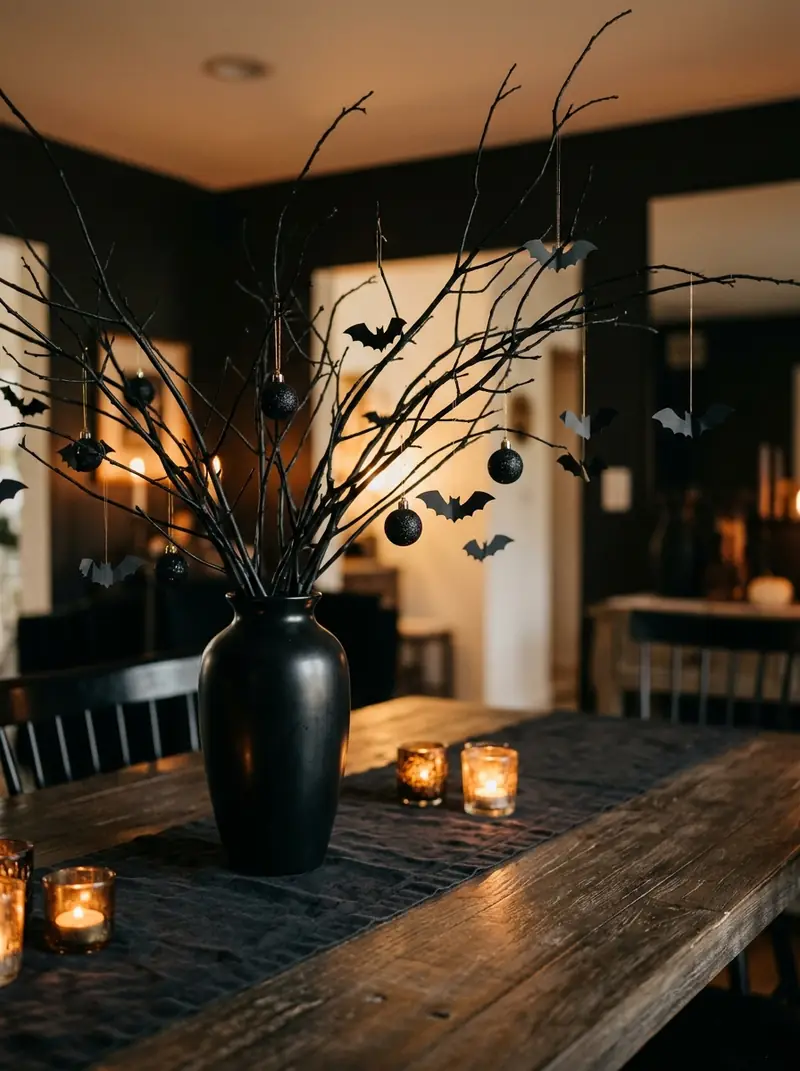
Bare branches from the yard make a free centerpiece. Paint them black or leave them natural. Place them in a tall vase with stones or dry beans for support.
Hang paper bats, small ornaments, or tiny lights from the twigs. This looks elegant for a dinner table or entryway.
26. Cardboard Haunted Picture Frames
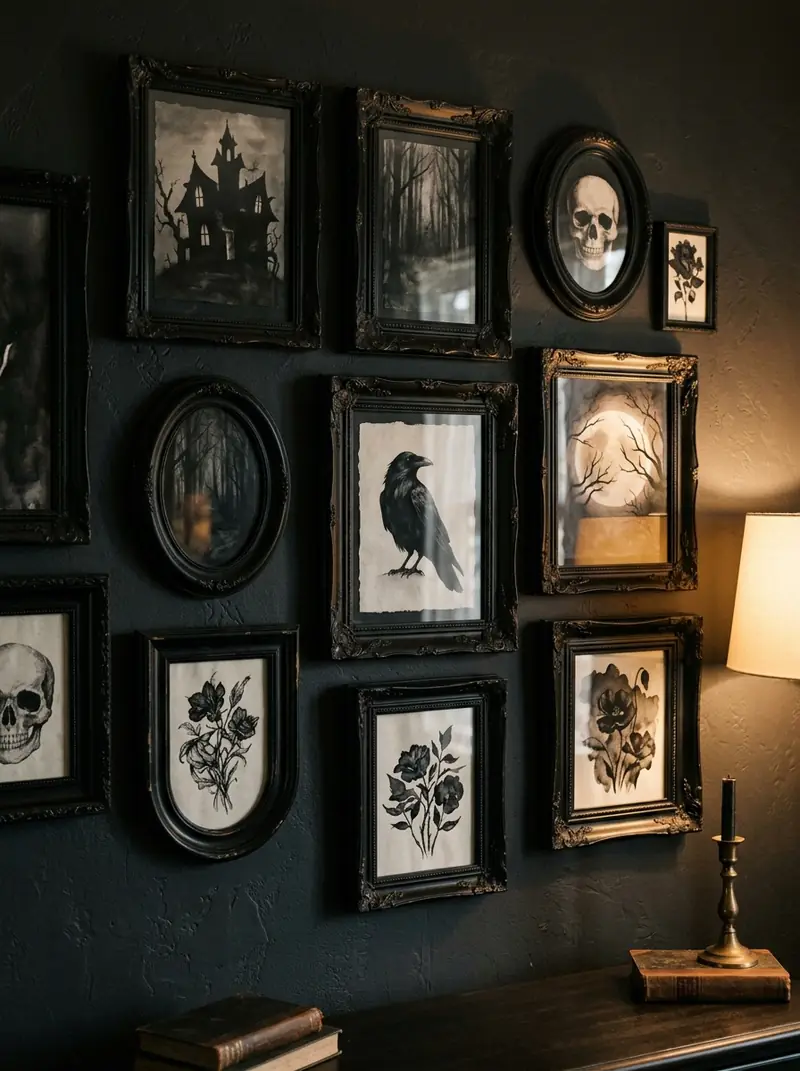
Old frames can become a Halloween gallery wall. Paint them black or dark brown. Fill them with printed art, paper cutouts, or fabric scraps.
Use free printables or your own drawings. Group frames of different sizes for a layered look. Take them down after the season and reuse them.
27. Tissue Paper Stained Glass Pumpkins
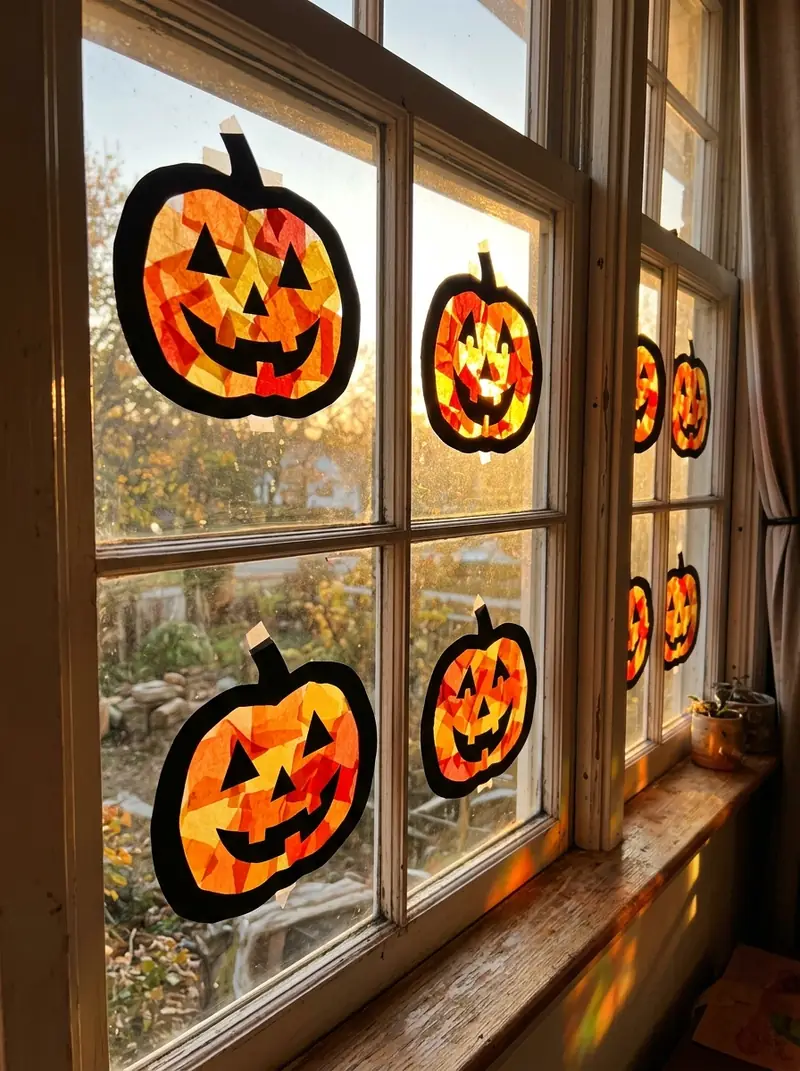
Tissue paper creates a glowing stained glass look. Cut a pumpkin shape from black paper and remove the middle. Glue orange and yellow tissue behind the opening.
Tape it to a window so light shines through. It also works as a kids craft. Use a glue stick or diluted glue for less mess.
28. Butcher Paper Table Runner
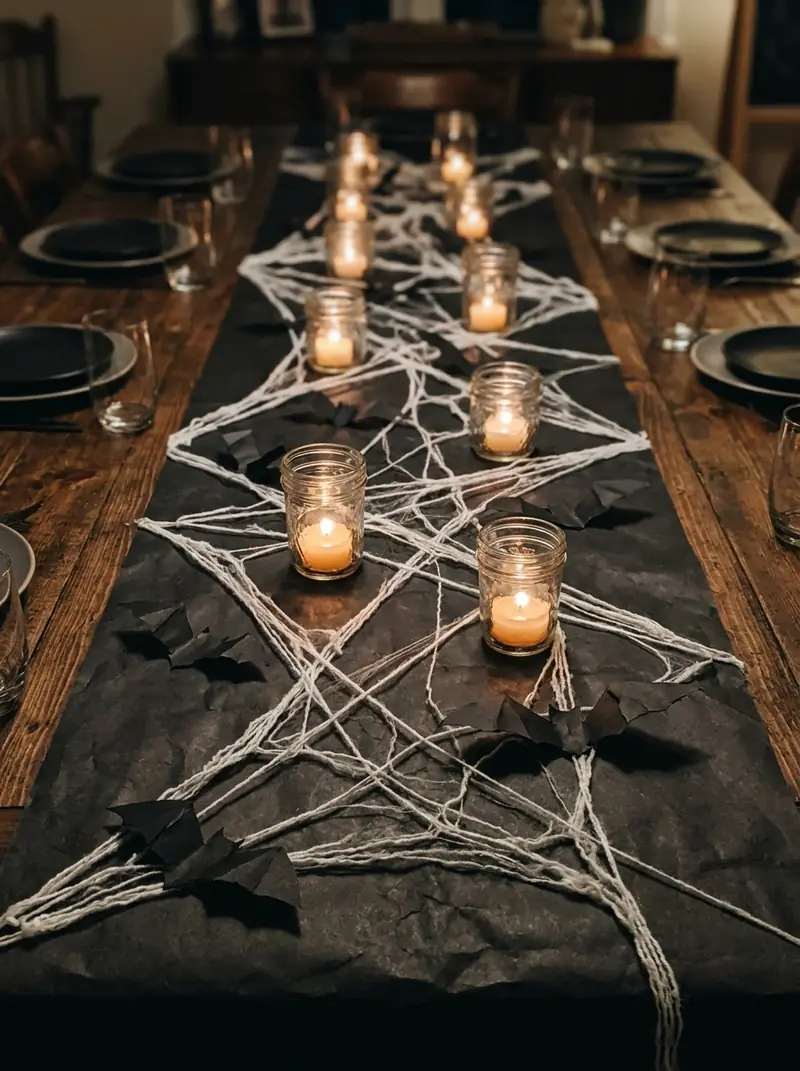
A paper runner is a fast way to dress up a Halloween table. Roll black butcher paper down the center. Add cobwebs with white crayon, chalk, or stretched cotton.
Place jars, mini pumpkins, and paper bats on top. Toss the paper after the party. Cleanup stays simple.
Best Picks If You Only Have Tonight
If you are short on time, start with these quick projects: paper bat wall swarm, black cat window silhouettes, toilet paper roll mummies, pipe cleaner spiders, paper bag lanterns, and the paper doily spiderwebs. They use basic supplies and need little drying time.
Save the slower projects for tomorrow or the weekend. Cheesecloth ghosts, painted pumpkins, and painted rocks need drying time. Times vary based on your skill and the materials you use.
Materials You May Need
Most of these projects use a small group of supplies. Check your home first before buying anything.
- Black and white cardstock or construction paper
- Scissors, tape, and a glue stick or hot glue gun
- Acrylic paint and brushes
- White cheesecloth, yarn, and twine
- Empty jars, cans, and cardboard tubes
- Flameless LED tea lights or battery string lights
- Pipe cleaners, felt, and googly eyes
Tips for Beginners
Start with one color palette, such as black, orange, and cream. It makes mixed projects look planned. Cut shapes in different sizes to create depth. Use LED lights for a warm glow without a flame.
Pick two or three ideas, not all 28. A few well-placed pieces look better than a crowded room. Test glue and paint on a scrap first, so you know how they dry.
Safety Notes for Halloween Crafts
Use flameless LED candles with paper, fabric, plastic, and cheesecloth. Hot glue guns get very hot, so adults should handle them or supervise closely. Cut tin cans carefully and smooth rough edges. Keep small parts such as googly eyes, beads, and pom-poms away from toddlers and pets.
Frequently Asked Questions
How can I make Halloween decorations on a budget?
Use items you already own, such as paper, jars, cardboard, socks, and yarn. Add a few cheap items like cheesecloth, felt, or craft paint. Stick to a simple color palette.
What household items work for DIY Halloween decorations?
Toilet paper rolls, milk jugs, glass jars, tin cans, cereal boxes, old socks, and paper bags all work well. Tree branches and rocks from your yard are free options too.
Can I make Halloween decorations in one night?
Yes. Paper bats, window silhouettes, pipe cleaner spiders, and paper bag lanterns are quick. Projects that need paint or stiffener take longer because of drying time.
Are paper decorations safe to use with lights?
Yes, if you use flameless LED lights. Do not place real candles inside paper, cheesecloth, or plastic decorations.
How do I store DIY Halloween decorations for next year?
Keep paper and fabric pieces flat or lightly packed in a dry box. Wrap fragile items in tissue paper. Store lanterns and jars with padding between them.
Start Your Next Halloween Craft
The best budget Halloween decor comes from simple materials and a clear plan. Pick a few ideas that fit your space, gather what you have at home, and keep the look consistent.
Ready to try one? Choose your favorite idea, gather your supplies, and start creating tonight. Explore more DIY ideas on CraftedMode and save your favorites for later.
Keep exploring: browse more Halloween ideas, read our Halloween costume ideas for adults and kids, or head back to the CraftedMode homepage for fresh DIY inspiration.